Import PST to Microsoft 365 For Free- Network Upload Methods
The majority of companies and organizations choose to use Microsoft 365 because it is a popular cloud-based service provider. For businesses transitioning to a cloud-based environment, migrating mailbox data to Office 365 is an essential first step. The network upload method is one effective way to move big volumes of Outlook data. Administrators can upload PST files to Microsoft 366 using this approach. To guarantee a smooth data transfer from PST to Office 365, we’ll go over how to use the network upload method step-by-step in this post.
Why Is PST to Microsoft 365 Migration Necessary?
For a number of reasons, importing PST files into Office 365 is crucial, particularly for users switching from a traditional Outlook setup to a cloud-based Microsoft 365 environment. The following are the primary driving forces behind this process:
- Data accessibility: Office 365 is a cloud-based service that lets users access their calendars, contacts, and emails on any device and from any location.
- Better teamwork: Teams may collaborate more easily regardless of their geographical locations thanks to Microsoft 365’s real-time editing and project management features.
- Data backup and protection: Office 365 has strong data protection capabilities that guarantee the security and backup of important data.
- Simplified management: PST to Exchange 365 migration simplifies the management of emails and other data. Account setup and management are simple for users.
- Always current: Office 365 customers don’t have to wait for significant releases to take advantage of ongoing upgrades and enhancements. Users will always have access to the newest features and security improvements thanks to this.
Import PST to Office 365 Using Network Upload Method?
Use the Network Upload Method to import PST files into Microsoft 365 by following the detailed instructions.
- Access your Office 365 administrator account:
- Open your browser and navigate to https://login.microsoftonline.com/ .
- After entering the admin email address, press the Next button.
- Click the “Sign in” button after entering the password.
- Assign the roles of mail recipients and mailbox import/export:
We must assign the mailbox import export role and Mail Recipients to the admin or the users who will carry out the migration process after successfully logging into the admin account. For this:
- Click on Admin in Microsoft 365.
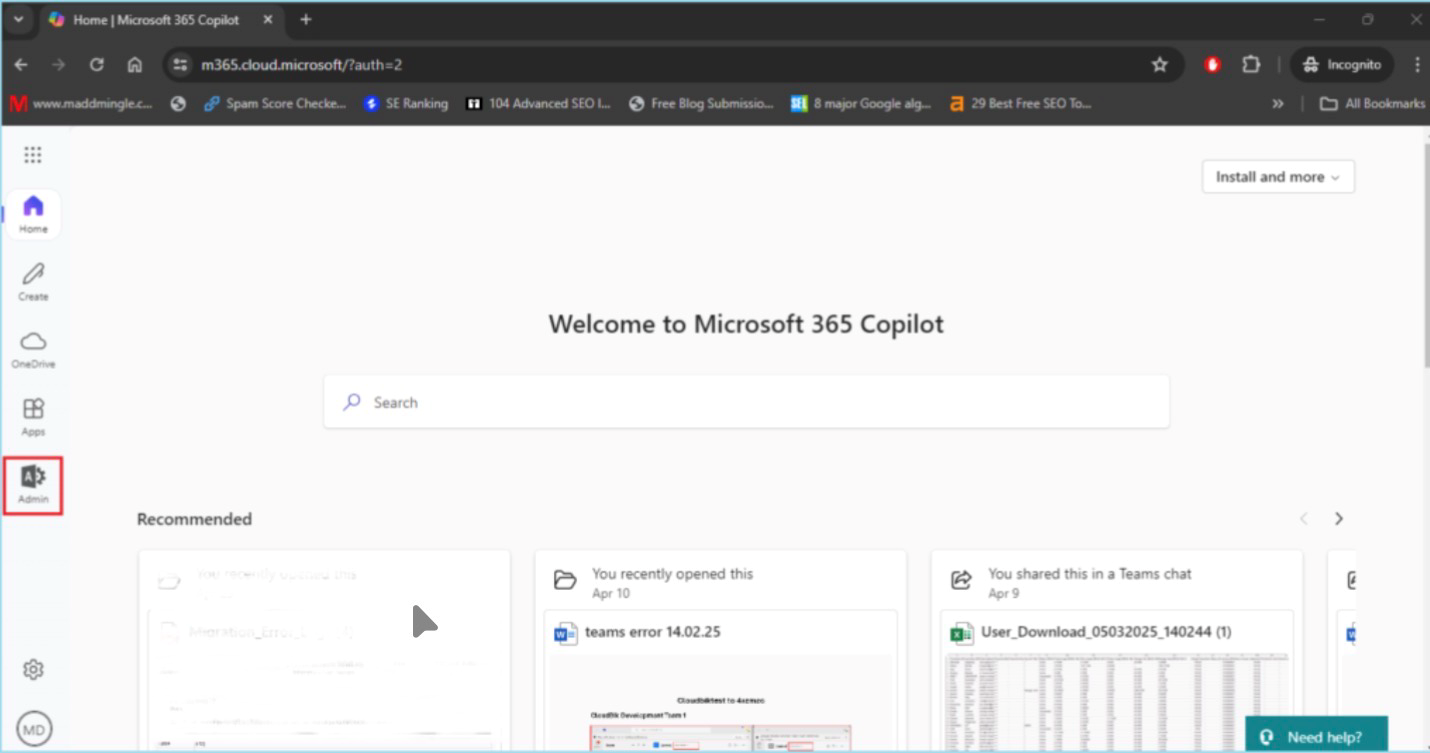
- To access Exchange Admin Center, click Show All in the Admin panel and choose Exchange.
- Click Role here, then choose Admin Role.
- Select Organization Management and click on Permission.
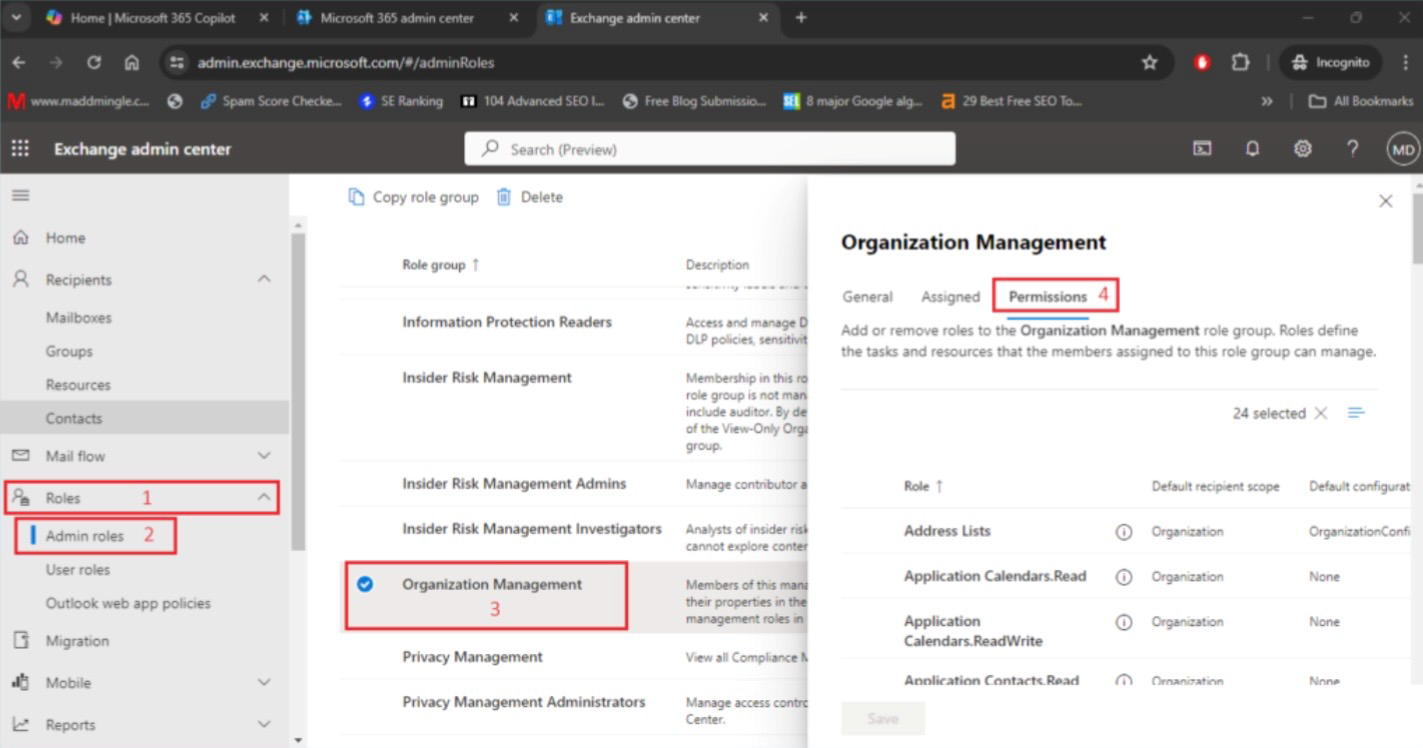
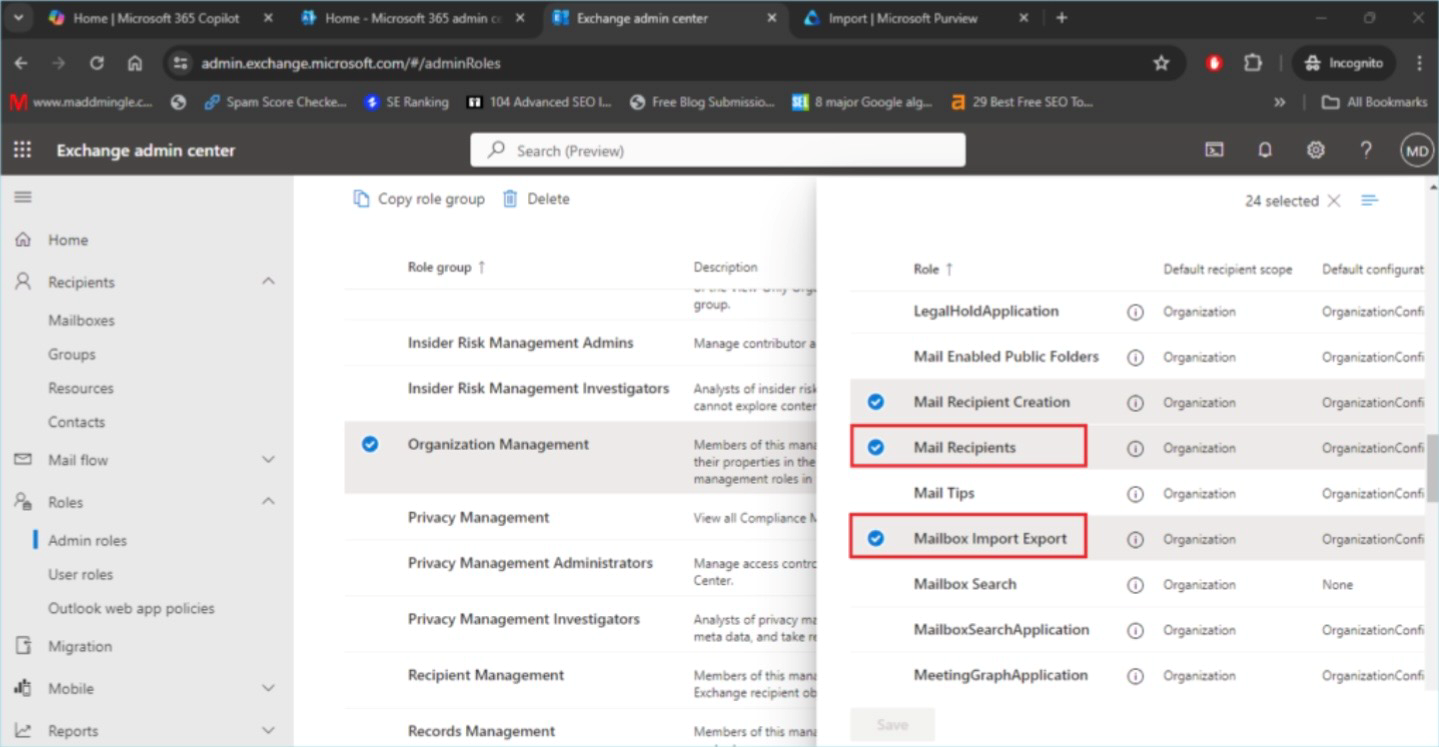
- Here you should find and select Mailbox Import Export and Mail recipients and then click on SAVE
- Click Assign now, then choose Add.
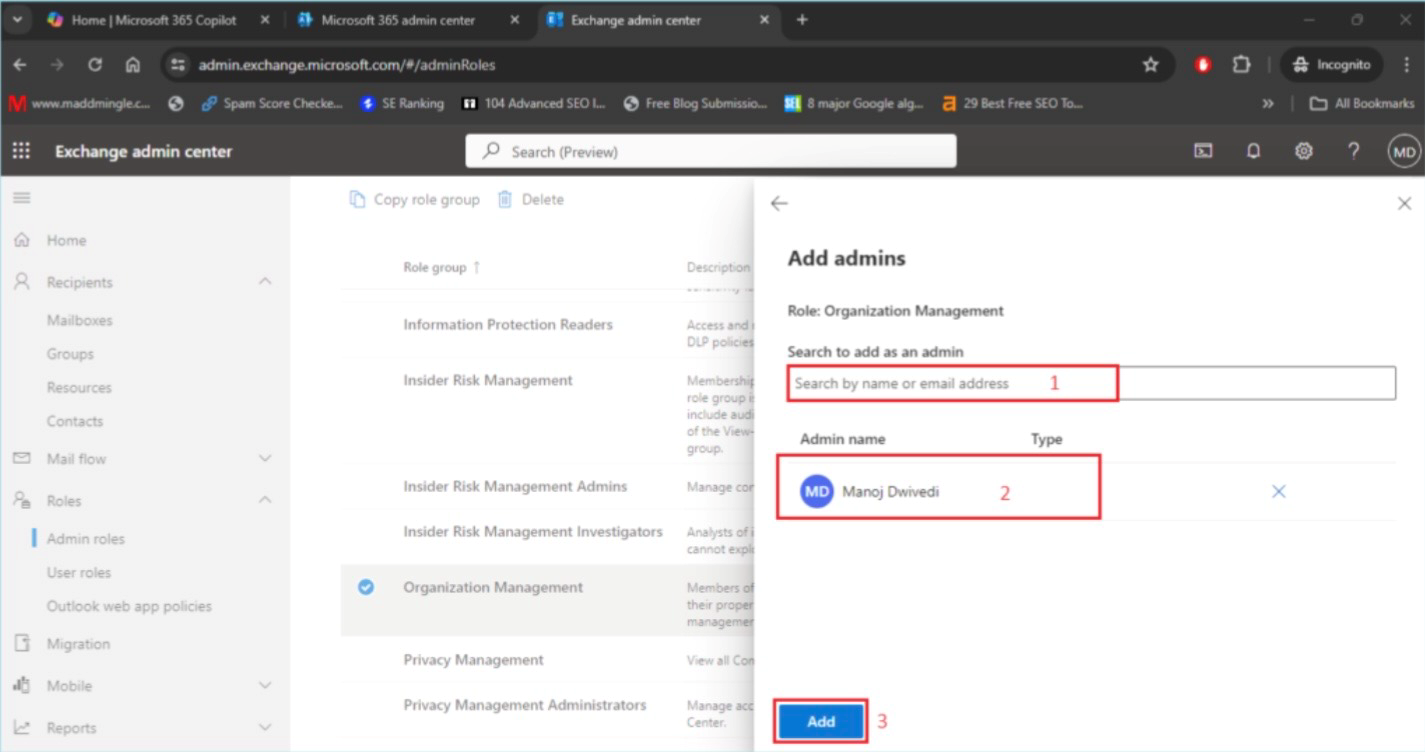
- Click the Add button after searching for the Admin ID or choosing the users you wish to assign the Mailbox Import Export and Mail Recipients roles to.
- Click on Admin in Microsoft 365.
- To import PST files into Office 365, create an import job.
The import job must be completed before beginning the migration procedure. For this
- Go to the Microsoft Exchange Admin Center and select Show All.
- To access the Microsoft Preview panel, select Microsoft Preview now.
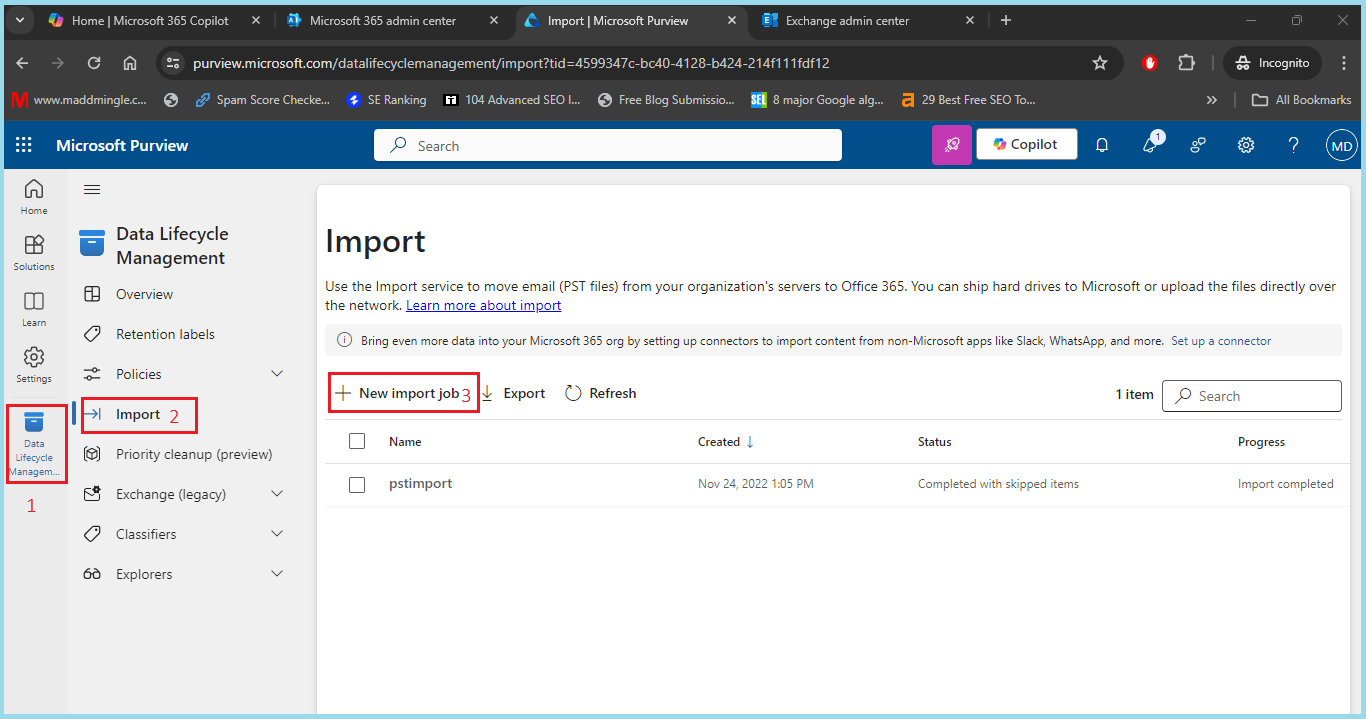
- Here, choose Data Lifecycle Management. Then, choose Import. Finally, click New Import Job
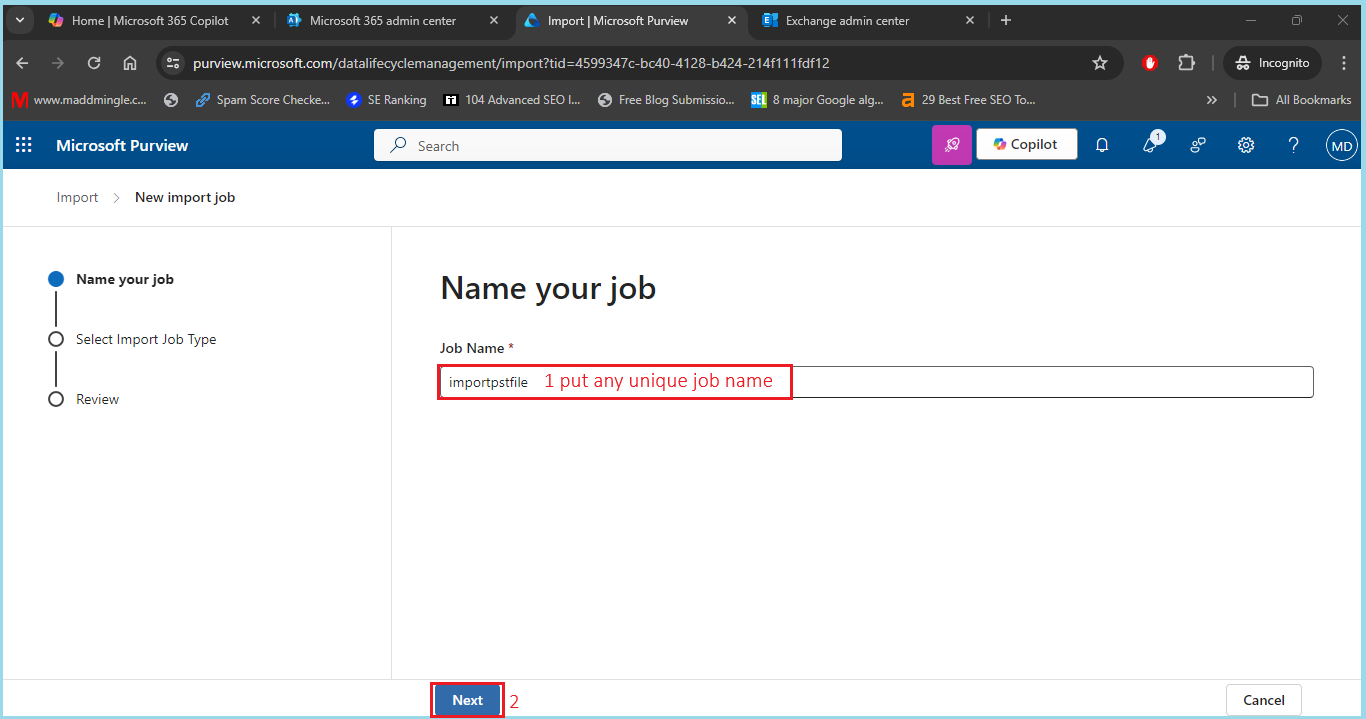
- Next, provide a distinct Import Job Name and click the Next button.
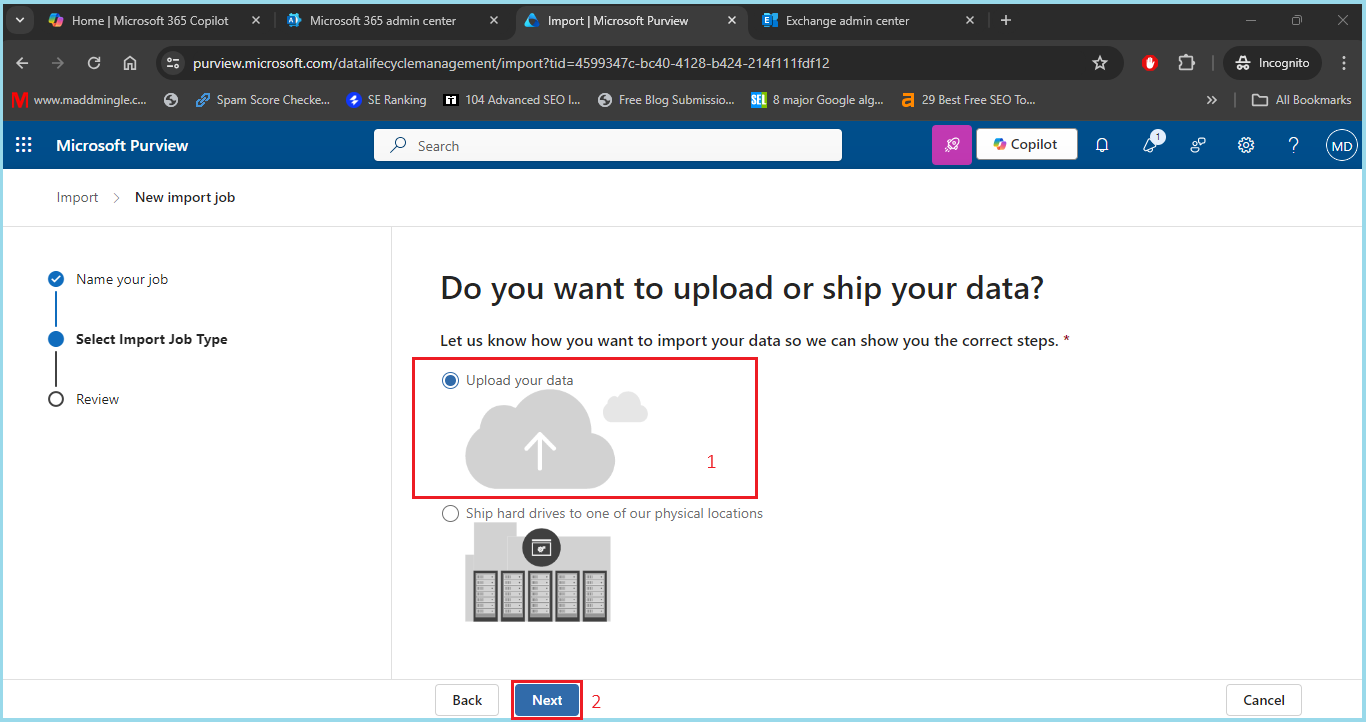
- Click Next after choosing Upload your data.
- Click “Show Network Upload SAS URL” now. Click on Download Azure AzCopy after copying the SAS URL.
- Choose the AzCopy portable binary that works best for your system and download it.
- Click on the downloaded unzip folder after unzipping the file. This file location’s path should now be copied and saved.
- Run the copied route as a screenshot after opening the command prompt.
- Go to the location of your PST file now. To export a PST file, right-click on it, select Properties, copy the PST file path, and update as a screenshot.
- The command below should now be copied and updated. Add the SAS URL and the PST file’s copied source location.
- Copy the command now, then execute it at the command prompt. Here, wait for the file to load.
- Return to Exchange Preview now. Check the box that says “I’m done uploading the files and I have access to the mapping file.” Click the Next button now.
- The CSV file has to be imported at this point. To obtain the example CSV file, click the provided link below.
- Open the CSV file now, then make an update similar to a screenshot.
- To add the revised CSV file, click Upload file. After verifying it, click the Next button.
- After confirming all the information, click the Next button.
- The file will now be uploaded to the cloud. Click “Done” once the upload is complete.
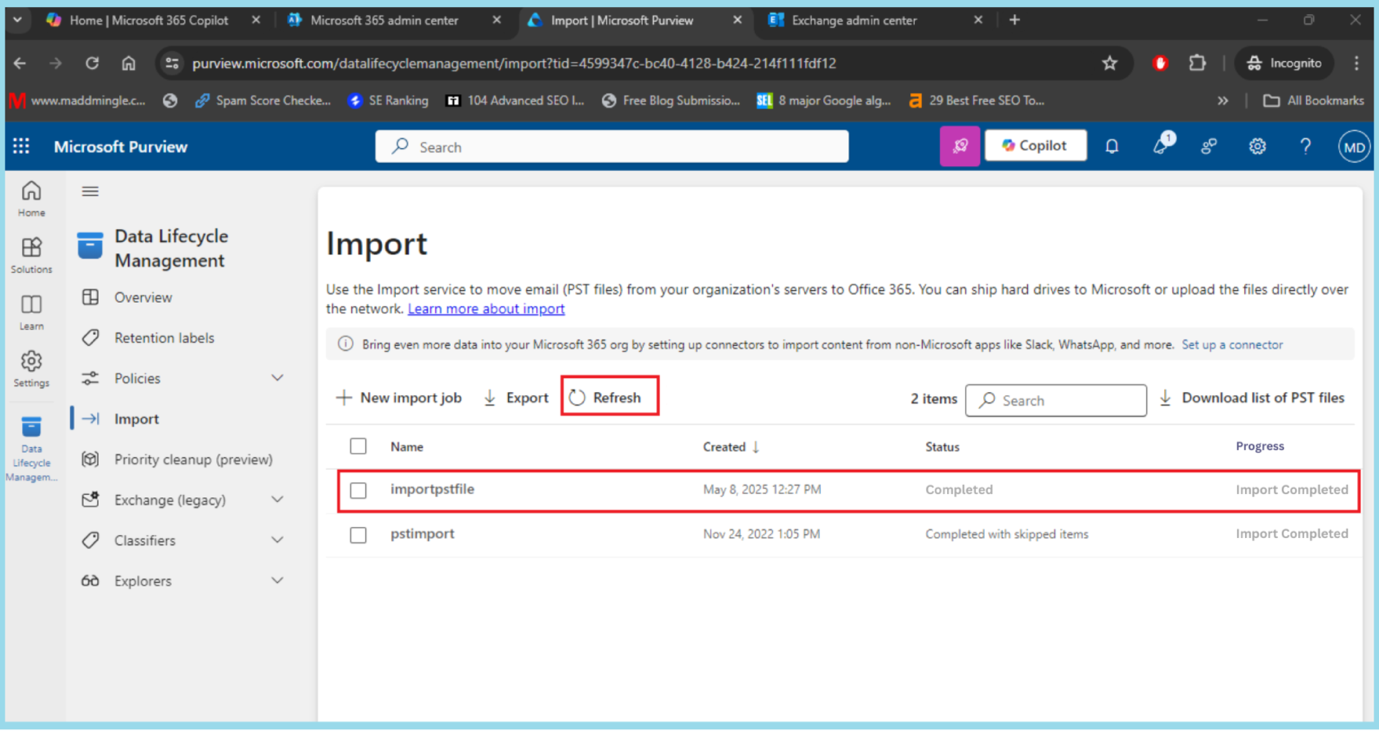
- There is now an Import Job. Here, wait until the import job procedure is finished. You may view the current progress status by clicking the refresh button.
- Once the import procedure is finished, click Import to Office 365 after selecting the created job.
- If you wish to apply a filter, choose “I want to filter it before importing.” No, I want to import everything and hit the Next button.
- The data size is now visible. Click “Submit” right here.
- The upload to the cloud has now been completed. Click the “Done” button here.
- Press the Refresh button. The import procedure has now begun.
- Here, wait until the procedure is complete. You may view the current progress status by clicking the refresh button.
azcopy.exe copy “<Source location of PST files>” “<SAS URL>”
https://go.microsoft.com/fwlink/p/?LinkId=544717
- Go to the Microsoft Exchange Admin Center and select Show All.
In conclusion:
This is how to use the Network upload method to import PST files into Microsoft 365. I think you may successfully import PST to Office 365 if you follow all the instructions. You can get in touch with us if you need assistance. Additionally, you can choose the potent GoldyTools PST to Office 365 Migration Tool if you’re looking for a straight approach and don’t want to complete all these processes. With this program, you can minimize the time it takes to upload PST files into Microsoft 365 and reduce the chance of data loss.
