In summary, the server administrator oversees all of Exchange’s features, including server settings, address, and name. However, any issues with Outlook or delays in email correspondence necessitate an Exchange Server check, which calls for details like your server address. The easiest method for locating an Exchange Server address will be explained in this blog. We advise utilizing the GoldyTools OST file conversion tool if the problem is caused by corrupted Outlook files.
Businesses can receive emails without any lag thanks to Microsoft Exchange Server, which manages a significant amount of corporate communication. However, Outlook users must undertake some troubleshooting, such as generating a new Outlook profile, if there is a problem with Exchange’s performance. Troubleshooting frequently necessitates the use of server-specific data, such as the address. Therefore, in order to sustain consistent communication and cooperation among enterprises, users must discover and find the Microsoft Exchange Server address. We will now discuss how to locate the Exchange Server address.
How can I find the address of a Microsoft Exchange server?
Let’s talk about how to identify my Microsoft Exchange Server address using practical ways now that we know why it’s necessary. Use each of the techniques listed below:
Use the Outlook program to find the Exchange Server address.
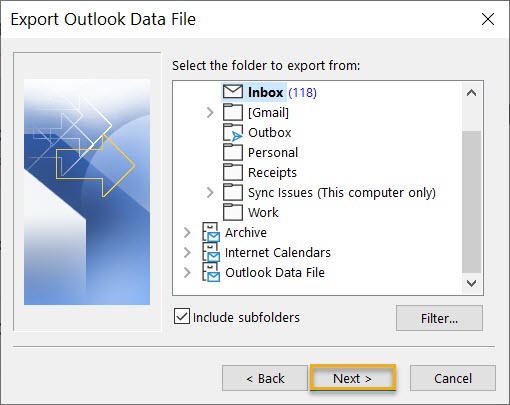
To download and store emails from the online server to offline OST files, the Outlook program establishes a connection with the Exchange Server. To keep the email status updated, Outlook periodically synchronizes with Exchange Server. Outlook need the name and address of the server for this synchronization. The following procedures can be used to locate the information about this server that is saved within Outlook:
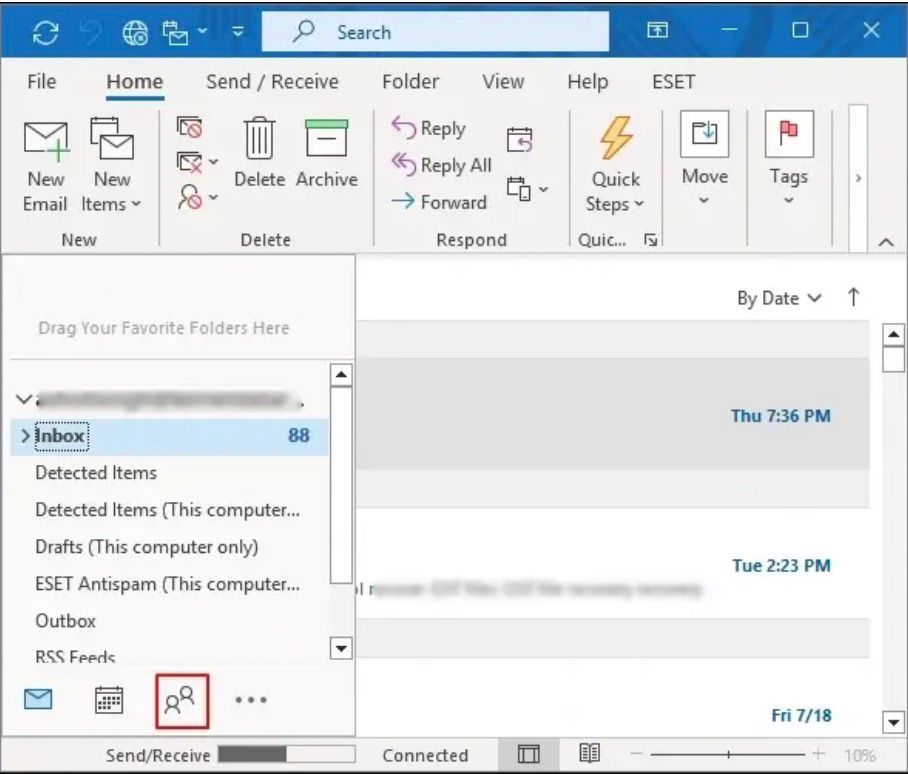
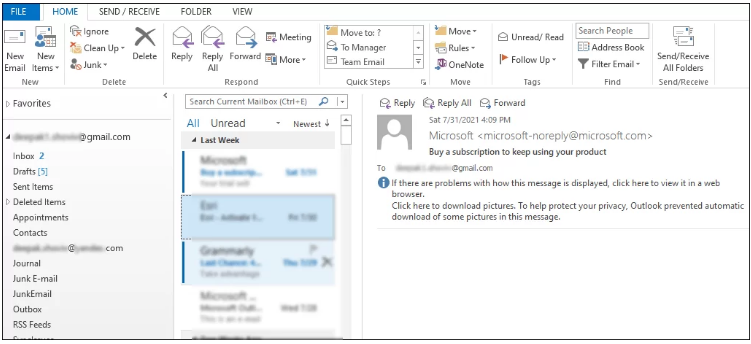
Step 1: Launch Outlook and check the status of the connection. Outlook displays “CONNECTED TO: MICROSOFT EXCHANGE” when it has an active connection with Exchange Server. To continue with the process, make sure this connection is maintained.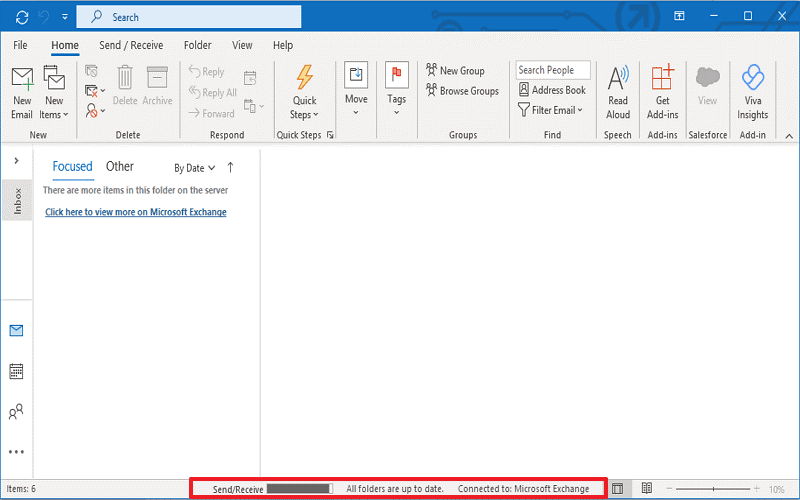
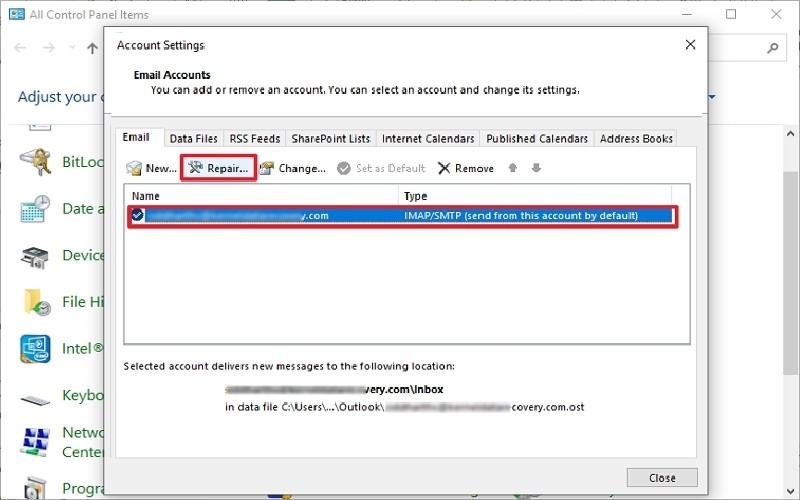
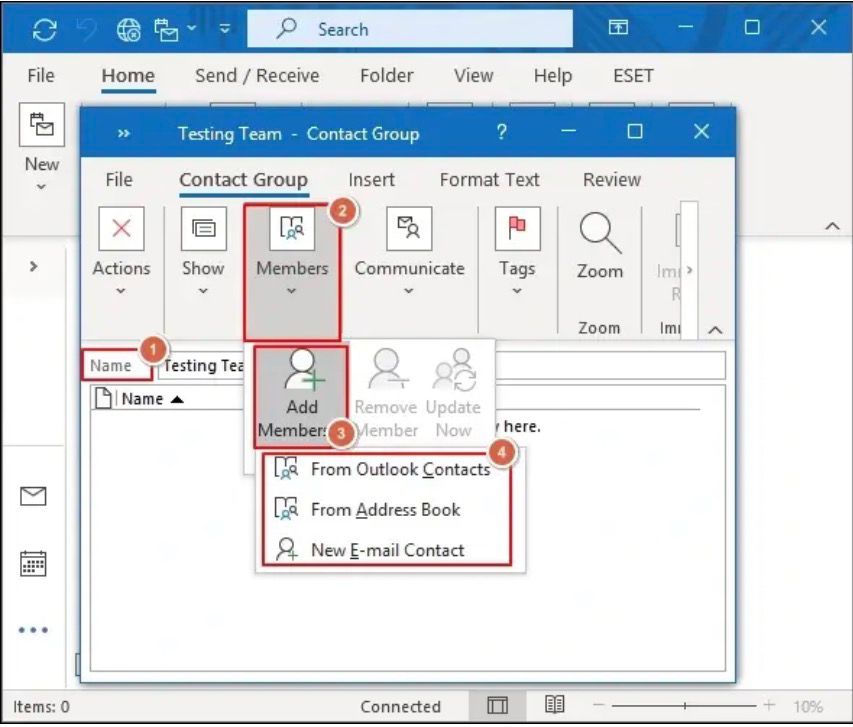
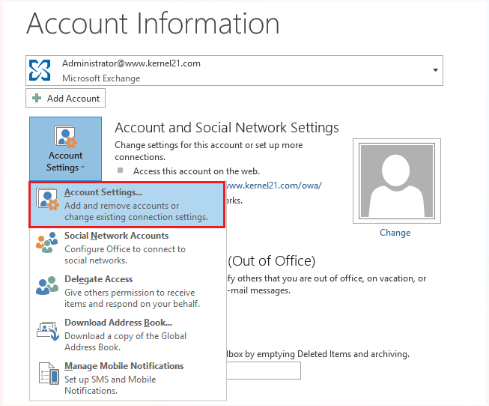
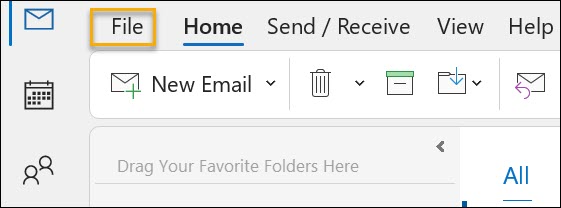
Step 2: Select File from the menu, then select Account Settings>>Account Settings.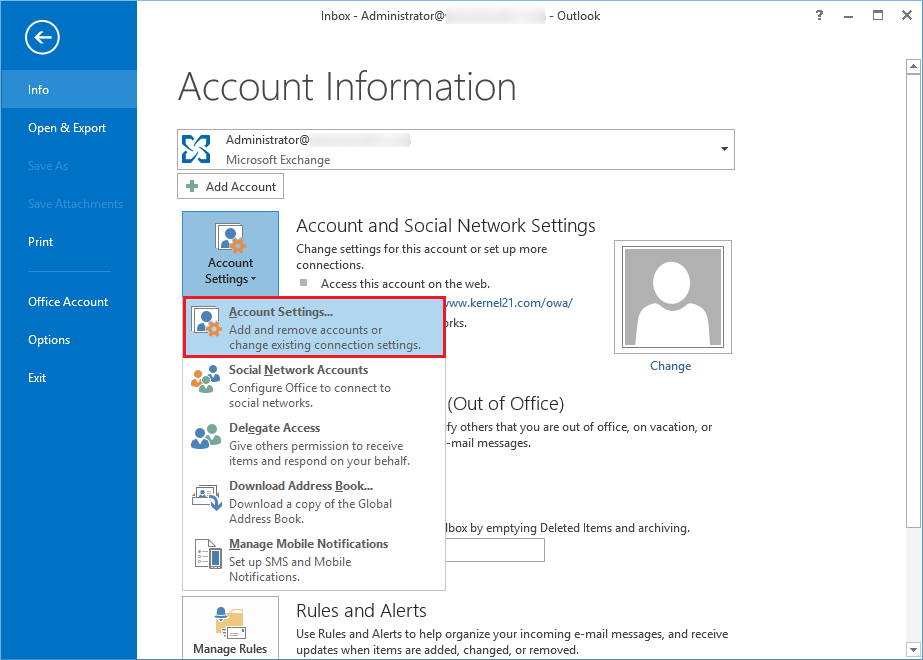
Step 3: Click Change after choosing the Exchange Account that has the server name you wish to verify.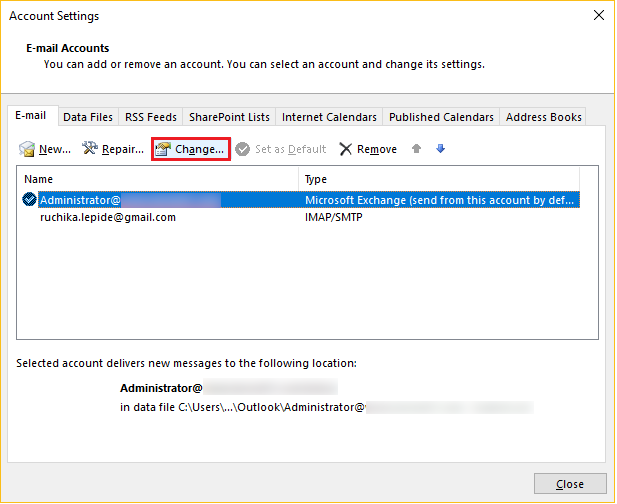
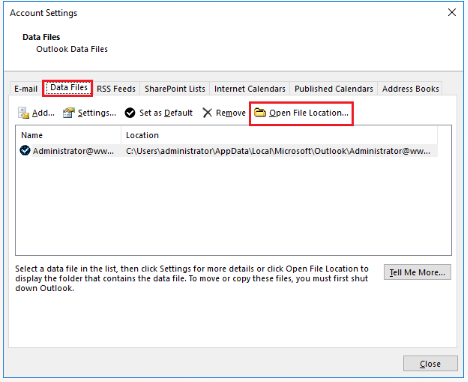
Step 4: Your Exchange server’s full name is displayed in the Server Settings section.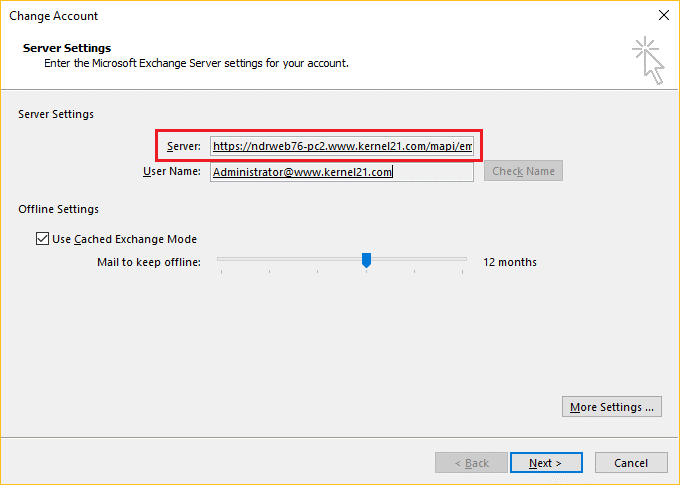
Outlook Web Access to determine the Exchange server address
All of the capabilities found in Outlook’s offline version are available in Outlook Web Access (OWA), an online version of the desktop program. All you have to do to find the exchange server address using OWA is go to Settings>Mail>Options>Mail>Accounts>POP and IMAP>note down values from POP Setting & IMAP Setting.
Use Exchange Management Shell to locate the Exchange Server address.
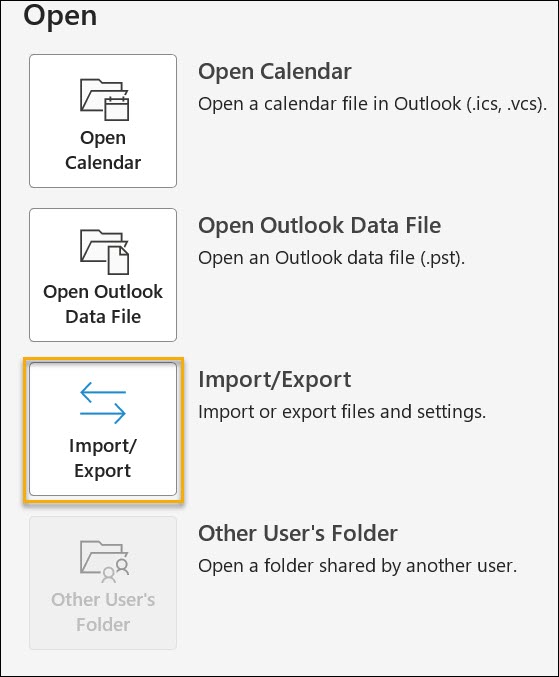
The EMS can be used to locate the Microsoft Exchange Server address if you have access to Exchange Server. To obtain all Exchange Server properties, including the address, you can use the following command in the EMS as administrator.
Get-ExchangeServe
Once you have access to your Exchange Server address, you may use it to resolve problems with incoming and outgoing messages. However, there are times when Outlook has trouble connecting to Exchange Server, and you have to continuously switching between different approaches to fix the issue. All things considered, the Get-ExchangeServe cmdlet is among the greatest resources for finding the Exchange Server name and other relevant information.
A few common connection troubleshooting techniques for Outlook
To implement a workable solution, you can use the techniques covered to locate the Exchange Server address and give it to the server administrator. Nonetheless, we provide a few safe troubleshooting techniques that anyone can utilize without relying on the Exchange Administrator.
1. Give Outlook a restart
It is the most straightforward way to fix the connection problem. Restart the machine if restarting Outlook doesn’t work. Outlook and Exchange Server connections frequently fail to establish when the Internet is unavailable. Therefore, restarting Outlook should resolve any connection issues that may have arisen as a result of small connection-related issues. Proceed to the next troubleshooting step if restarting Outlook is not successful.
Disable the offline mode
Often, the users set the Outlook to the offline mode unknowingly, and it stops emails from incoming and outgoing. So, you should disable this option and reconnect Outlook with Exchange. Follow the steps mentioned below to toggle Outlook’s offline mode to online.
Step 1. Click the Send/Receive option on the menu.
Step 2. Go to the Work Offline button and click it.
Step 3. The status of the Outlook will change to ‘Trying to Connect’ from ‘Offline.’ Soon it will show the status as ‘CONNECTED TO: MICROSOFT EXCHANGE
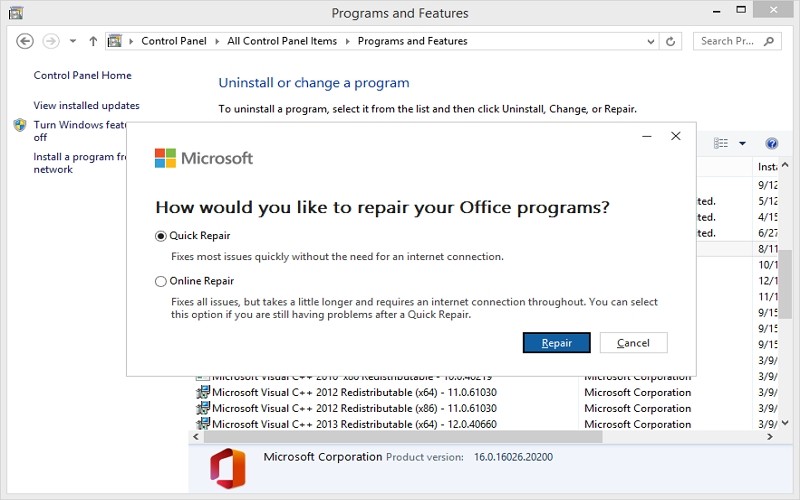
Conduct an installation repair
A repair feature in Microsoft Office can assist users with little problems. To fix the connectivity problems, you can do a repair installation from the Control Panel.
Step 1: Go to the Control panel after closing the Outlook program.
Step 2: Select Features and Programs.
Step 3: Click Change after selecting Microsoft Office.
Step 4: After clicking Repair, choose Continue.
Step 5: After the repair procedure is finished, restart the computer.
Step 6: Launch Outlook and see what’s going on.
Make the OST file again
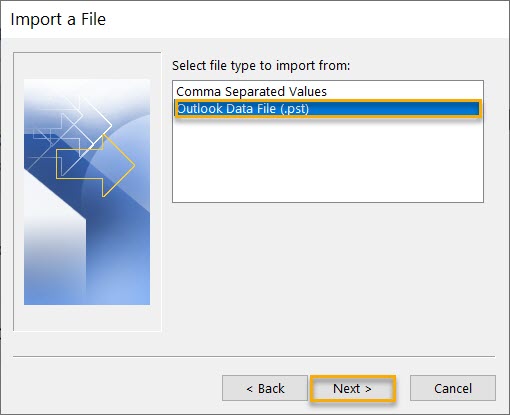
Due to its local computer storage, the OST file is highly susceptible to corruption from hardware problems or infection. The Outlook program may be unable to connect to Exchange Server due to a corrupt OST file. Therefore, you can regenerate the OST file, which can solve the Outlook connection problem.
You can also attempt to turn off your antivirus software. These anti-malware programs occasionally flag Outlook data files as dangerous and prevent users from accessing Outlook. In the end, this caused problems with connections.
To fix the corrupted PST file, use the Scanpst program.
Outlook provides a default scanning program named scanpst.exe that fixes minor corruption-related problems in PST files. The OST file can be scanned using the free SCANPST program. If there are any corruptions, it will check for them and prompt you to rectify them. Furthermore, it can only fix small corruptions in files up to 2GB in size.
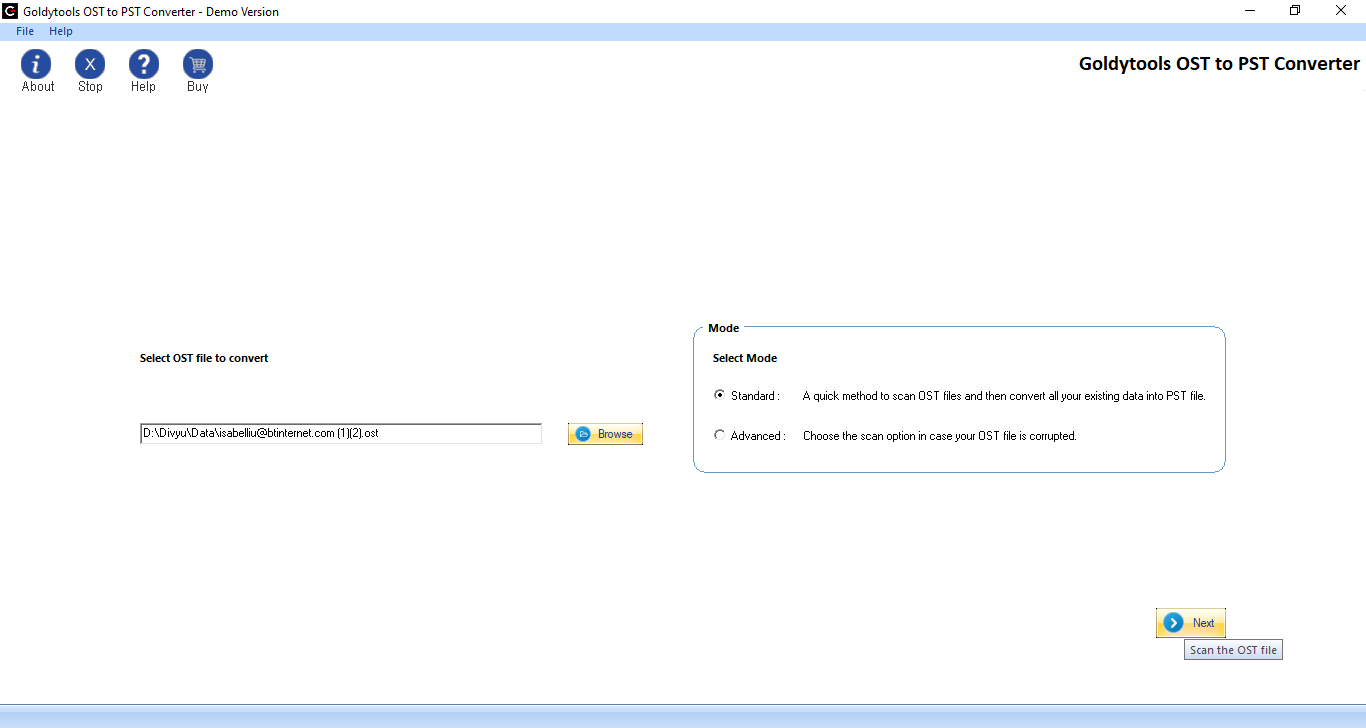
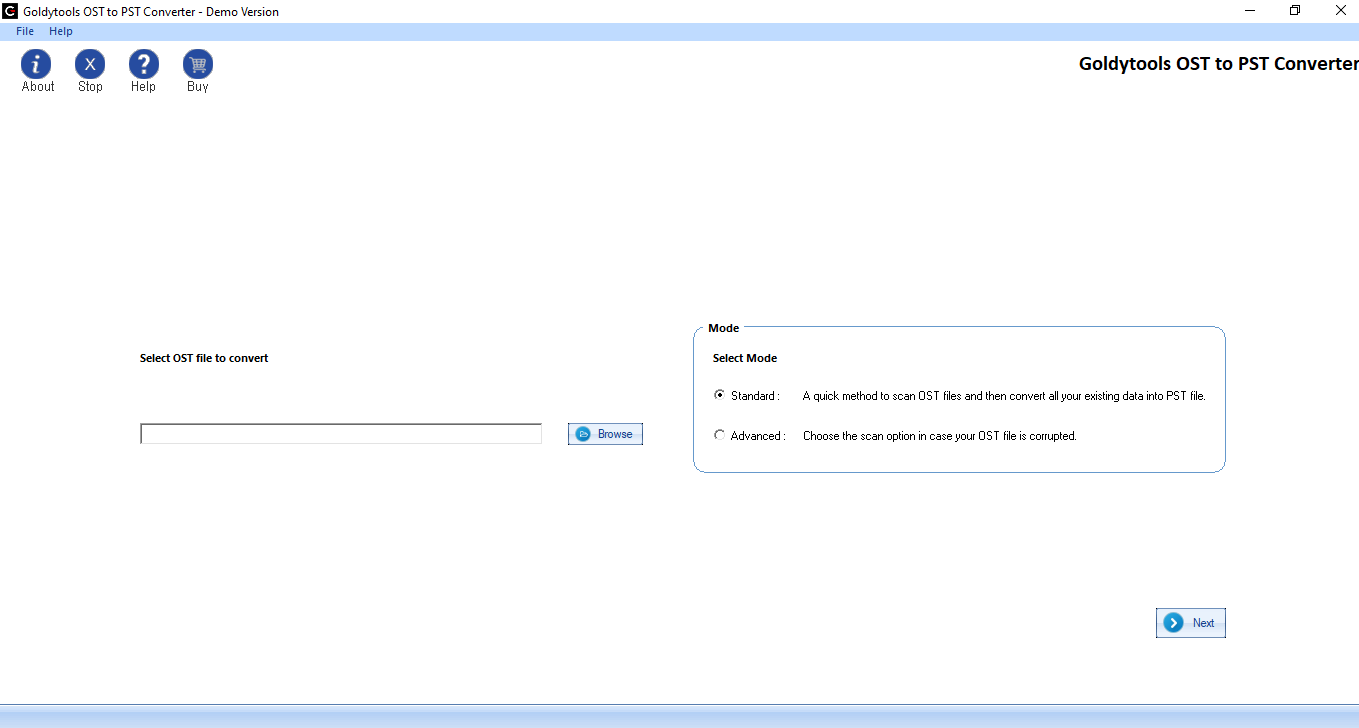
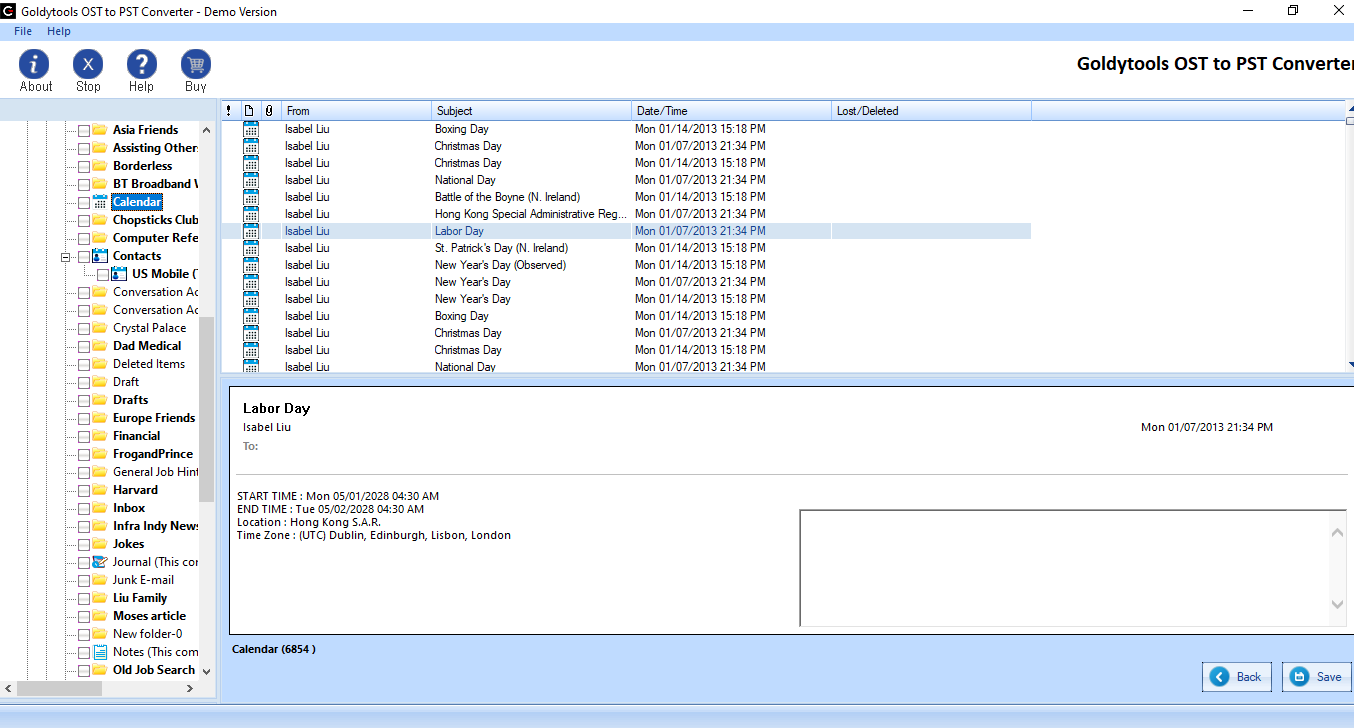
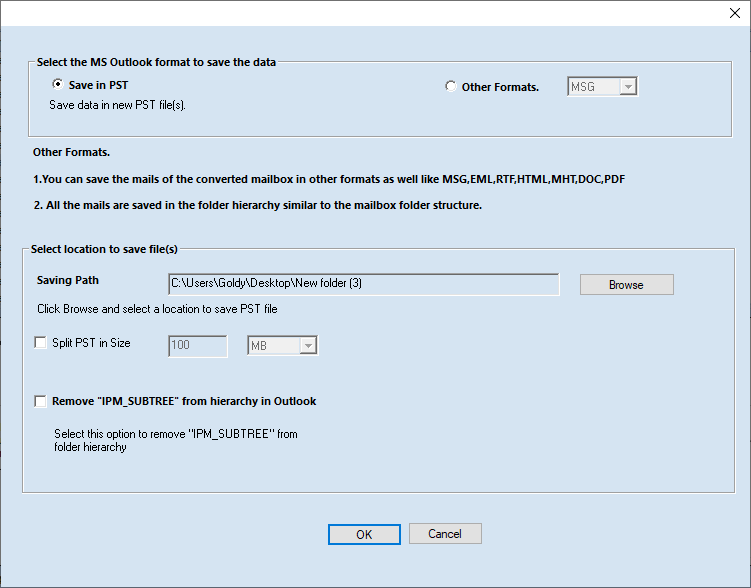
But when the SCANPST malfunctions and results in data loss because of serious corruption, large OST files, etc., the situation becomes dire. Therefore, it is safe and secure to rely on an automatic and expert GoldyTools for the OST to PST Converter tool. It actively collects data from OST files and transforms it into a variety of formats, including PST, DBX, EML, MBOX, PDF, and many more. You can transfer the current OST file to different mail servers and clients while maintaining data integrity by using this OST to PST converter Tool.
In conclusion
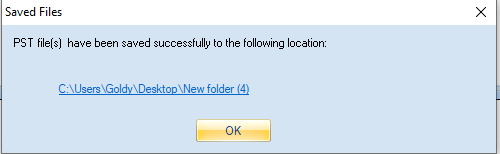
We now know how to use the methods mentioned above to efficiently find my Exchange Server address. You shouldn’t rely solely on manual troubleshooting techniques when Outlook isn’t connecting to Exchange because of corruption in the data file. These techniques just look for errors and don’t offer a practical fix. GoldyTools for OST to PST Converter is an excellent tool that can restore the content of corrupted, orphaned, or unavailable OST files. The restored data can be accessed in Outlook and saved as a PST file. Get it now!
FAQs
Q- What is the URL for the Exchange server address?
A. The server address URL is required in order to access your Exchange server. In essence, this URL is a link to the web interface on your server, where you may control your calendar, email, and other functions. The fully-qualified domain name (FQDN) of your server is automatically included in the Exchange server address URL in the manner https://<ServerFQDN>/ecp. This implies that your web browser will take you to the Electronic Control Panel (ECP) of your Exchange server after you enter this URL.
Q – What is the default location of the Exchange server?
A. The server should be located at C:\Program Files\Microsoft\Exchange Server\V15 if you are using Exchange 2016 or Exchange 2013. However, the default location for Exchange 2010 would be C:\Program Files\Microsoft\Exchange Server\V14.