All posts by harshit

How to Fix Error 0x800ccc0e in Outlook

If you are getting error 0X800CCC0E in Microsoft Outlook and looking for a solution to resolve it, then this blog will be of great help. In this blog, we will learn about various reasons for error 0X800CCC0E in MS Outlook and the manual methods to fix this error. There are situations when an individual configures an email account in MS Outlook and may encounter error 0X800CCC0E while attempting to send an email.

Outlook send/receive progress

Outlook send/receive progress

  • When sending an email, Outlook does not authenticate your Account on the server, and the Outlook mail server rejects the email message.
  • Duplicate accounts.
  • Conflict between SMTP servers while using an email program or when users try to send emails during account configuration.
  • Antivirus Settings restrictions
  • Features blocked due to Firewall.
  • Faulty and corrupted add-ins or files
  • Unwanted or suspicious emails

Manual methods to fix error 0X800CCC0E in Outlook

Configuring your Email account in MS Outlook

  1. Launch the Microsoft Outlook application.
  2. Navigate to Accounts -> Properties -> Servers.
  3. Check the option “My server requires authentication”.
  4. Enter the email ID and password for your email account.
  5. Click Apply and Accept.
  6. Try sending an email.

Check Server Requirement from Settings

  1. Now, start the Microsoft Outlook application.
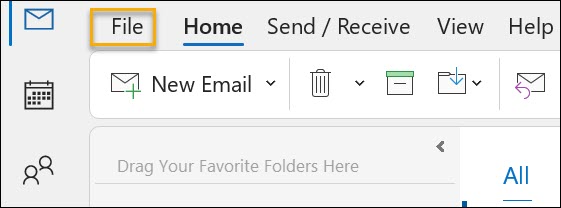
  2. Navigate to File-> Tools -> Account Settings.
  3. After this, select the Email and choose your Email account from the list.
  4. Click More Setting.
  5. Click the Outgoing Server tab.
  6. Enabling the “My outgoing server (SMTP) requires authentication” option.
  7. Click OK to apply the changes.
  8. Restart the MS Outlook application.

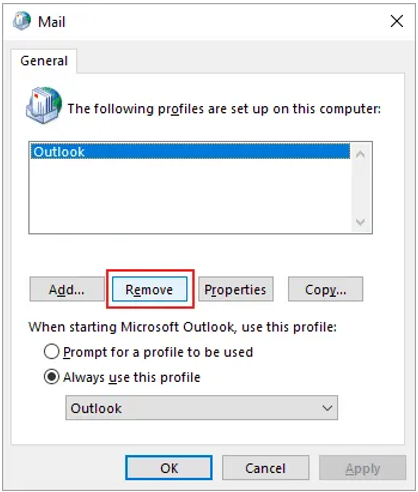
Delete Duplicate Accounts

  1. On the Outlook menu, select Tools.
  2. Navigate to the Accounts -> Mail tab.
  3. Select duplicate mail account.
  4. ClickRemove to remove the duplicate Account.
  5. Restart the MS Outlook application

Change Server Port Number

  1. Launch the MS Outlook application on the system.
  2. Navigate to File -> Tools -> Account Settings.
  3. Click the Email tab -> select your Email account from the list.
  4. Click More Settings and open the Advanced tab.
  5. Change the Outgoing Server (SMTP) port number to 587.
  6. Click OK to apply the changes.
  7. Restart the MS Outlook application

Repair Outlook

  1. Press Windows + X->select Apps and Features.
  2. Locate MS Outlook ->, click on it ->from the available options, and click Modify.
  3. Select the Quick Repair option -> click Repair.
  4. In a few minutes, the software can detect and resolve the issue.
  5. On completion of the repair process, launch MS Outlook.

Reinstall Outlook

  1. Open Control Panel->navigate to Programs and Features.
  2. Select MS Office application.
  3. Now, ensure you tap Uninstall at the top of the Programs and Features window.
  4. An uninstallation wizard opens. Follow the on-screen instructions to uninstall MS Office.

  5. After the uninstallation of the MS Office procedure is completed, you need to install MS Office again.
  6. After installing MS Office, create your email account.
  7. Try sending an email.

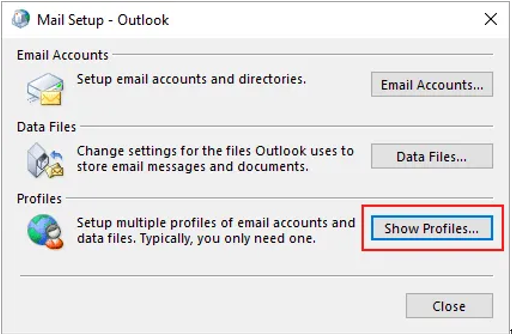
Remove and again add the email account

Remove Email Account

  1. Launch MS Outlook -> navigate to the File menu.
  2. Click Account Settings and then select Account Settings.
  3. Select the email account that you want to remove->click Remove.
  4. From the Account Settings popup, click Yes to confirm.
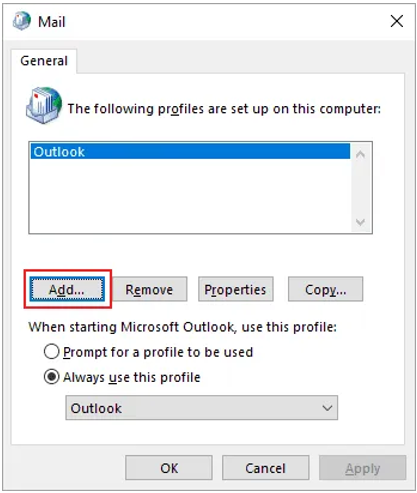
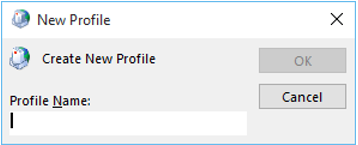
Add Email Account

  1. Launch MS Outlook. ->navigate to the File menu and ->click Add Account.
  2. Enter your name, Email, and password, and retype the password.
  3. Click Next to proceed.
  4. Once the Account is configured correctly, click Finish

Perform a Clean Boot

  1. Open your system as an administrator.
  2. In the search bar, type msconfig->select System Configuration.
  3. In the System Configuration window, select the Services tab.
  4. Select Hide all Microsoft services checkbox->click Disable all.
  5. Select the Startup tab and ->select Open Task Manager in the System Configuration window.
  6. Select every item in the Task Manager and ->click Disable.
  7. Close Task Manager and restart your system.
  8. Install MS Outlook and add the email account again

Check Internet Connection

  1. Click the internet icon in the taskbar-> select the network with “No Internet, secured” displayed.
  2. If the Forget button is visible, click it.
  3. Connect to your network again.

Professional OST to PST Converter Software

If you are still getting error 0X800CCC0E in Outlook, we recommend using third-party OST to PST converter software. This software effectively resolves error code 0X800CCC0E in Outlook without any data loss and supports all versions of Microsoft Outlook. The OST to PST Converter software is also available as a free trial version.

Conclusion

This blog highlights all the possible reasons for error 0X800CCC0E in Outlook and the manual methods to fix it. In case you are still unable to resolve the error code, we recommend using professional third-party OST to PST converter software. The tool allows saving recovered emails in PST, MSG, EML, and MBOX file formats.

Reasons for Exchange Database Corruption & How to Get Rid of It

This blog discusses the various reasons for the corruption, damage, or inaccessibility of the Microsoft Exchange Server database and the methods for overcoming this situation.

Reasons for Exchange Database Corruption

Let’s first discuss the possible reasons for the corruption of Exchange Server database EDB files. At a very high level, the reasons for damaging Exchange EDB files can be categorized into two categories: corruption due to physical errors and logical errors.

Physical Corruption

  • Hardware failures include hard drives, raid controllers, motherboards, and other components.
  • Disk failure
  • Loss of power/power outage
  • VM / Physical Server rebooted

Logical Corruption

  • Invalid index entries
  • Cross-object chain linkage
  • Corruption in the file header
  • Corruption in access control levels
  • A mismatch between the Exchange log file generation number and signature
  • Incorrect data restoration in the Exchange database

Common Exchange Server EDB file Errors

  • JET Engine Errors
  1. 344 – JET_errDbTimeCorrupted (Time Mismatch Error)
    This error appears when there is a time mismatch between the DB and the directory.
  2. 501 – JET_errLogFileCorrupt
    This error appears when the hardware corrupts the I/O when writing or when the hardware loses a flush, making the log unusable.
  3. 510 – JET_errLogWriteFail
  4. 528 – JET_errMissingLogFile
  5. 543 – JET_errRequiredLogFilesMissing
  6. 550 – JET_errDatabaseDirtyShutdown
    This error appears when the Administrator modifies logs or loses the I/O flush on shutdown.
  7. 551 – JET_errConsistentTimeMismatch
  8. 567 – JET_errDbTimeTooNew
  9. This error appears because the disk subsystem lost an I/O, most probably during a hang or unscheduled shutdown.

  10. 1018 -JET_errReadVerifyFailure
    One encounters such an error during page-level corruption in Exchange EDB files that cannot be repaired with the inbuilt Exchange Server utility. It also occurs during the creation of an online backup, i.e., a cloud backup.
  11. 1019 – JET_errPageNotInitialized
    This error appears when the requested page is empty or uninitialized in the Exchange Database.
  12. 1021 – JET_errDiskReadVerificationFailure
    This error appears due to bad blocks on the hard disk.
  13. 1022 – JET_errDiskIO
    This error appears when the disk Input/Output process restricts the Exchange Server’s access to the targeted page in the Exchange database.
  14. 1032 (JET_errFileAccessDenied, cannot access file, the file is locked or in use)
  15. JET_errFileAccessDenied

  16. 1206 – JET_errDatabaseCorrupted
  17. 1216 – JET_errAttachedDatabaseMismatch
  18. JET_errAttachedDatabaseMismatch

  19. 1601 – JET_errRecordNotFound
    This error appears when the STM and EDB files have different structures or when the Exchange Database EDB file has severe corruption.
  20. 1605 – JET_errKeyDuplicate
    This error appears due to index corruption.
  21. 1811
    This error appears when the Administrator modifies logs or loses the I/O flush on shutdown.
  22. 0xfffffdfd – JET_errInvalidLogSequence
    This error appears due to missing log files or log file mismatch.
  23. JET_errFileAccessDenied (Anti-Virus)
    • Dirty Shutdown State
    • Unable to mount database
    • mount database

    • 1056749110 error
    • Unable to initialize Exchange Information Store Service –Error 0x8004010F
    • This error appears when the Information Store fails to initialize. This error disfunctions the smooth functionality of the Exchange Server.
      Error 0x8004010F appears when a synchronization issue occurs between the clocks on the Server system and the client system.

      Outlook send/Receive progress

    • Inconsistent or missing log files
    • Low or no disk space
    • Licensing
    • Database mount error: (hr=0x80004005, ec=-501)
    • Failed to mount database "Mailbox Database"

    • Time mismatch in the DB compared to the directory. (Unable to mount database. (hr=0x80004005, ec=-344))
      This error occurs when there is a time mismatch between the DB and the directory.
    • Exchange Error 1056749110
      This error appears when corrupt items are present in the mailbox.
    • Machine :xptest

    • Permission Issue
    • Anti-Virus
    • The exchange database won’t mount (Cannot see Active Directory)
    • SMTP Virtual Server and Connector Configuration
    • Dirty Shutdown issue
    • The Exchange Server reached its Limit (16 GB)
    • Minor Corruption

    Manual Methods to Resolve the Exchange Server Database Errors

    Exchange Server Database Utility (ESEUTIL)

    It is an inbuilt utility that supports repairing Exchange Server 2007, 2010, and 2013 versions. It is an executable utility that repairs all the errors in Exchange mailboxes, public folders and transport server queue databases.

    ESEUTIL/p mode auto corrects the damaged Exchange EDB files at page or table level, not in application level.
    Syntax – ESEUTIL/P databasefilename. edb

    Limitations with ESEUTIL

    • Time-consuming process
    • Incorrect execution of commands
    • Permanently deleted data gets recovered
    • Requires much space
    • Demands technical skills and expertise to execute the commands

    Professional third-party EDB to PST Converter

    Since the manual method to repair corrupted EDB files has some limitations, we recommend that our users use a third-party EDB to PST Converter software to repair corrupted EDB files and restore the Exchange mailboxes on the server. The EDB to PST Converter restores mailboxes on the Live Exchange Server and resumes mailbox connectivity lost due to the dismounted Exchange mailbox database. Use EDB to PST Converter to backup Exchange Server data to Office365 account.

    Conclusion

    Let us try to determine the reasons that cause the Exchange database to be corrupted, damaged, or inaccessible. To resolve this, users can try the manual method explained, but it has some limitations. We suggest our users use third-party EDB to PST Converter software to restore mailboxes on the Exchange Server.

What do you do when emails get stuck in your Outbox?

If you have ever had your emails remain in the Outbox folder, then you can attest that it is a very annoying situation, especially if you have an urgent message to send. This is a familiar problem with Outlook and may be due to several factors. It is essential to know these reasons and how to sort them out to have efficient communication. So, let us get into the details

Reasons for emails to get stuck in your Outbox

Of course, before we proceed to the solutions, it is crucial to understand why your emails are stuck in the Outbox. Several factors can contribute to this problem:

  • Large Attachments: Outlook’s sending process can be bogged down when you send emails with big attachments.
  • Poor Internet Connection: Sometimes, the internet connection is poor, which may hamper the sending or sharing process, and emails remain in the Outbox.
  • Outlook Add-Ins: Certain third-party add-ins may clash with Outlook, leading to problems sending emails.
  • Corrupted Outlook Profile: Outlook profiles can be corrupted, and this can cause many issues, such as emails not being sent properly and staying in the Outbox.
  • Server Issues: On some occasions, the issues arising from the server on the side of your email provider may lead to a delay in sending emails

In other words, when you attempt to send an email, it is not delivered to the recipient; instead, it arrives in your mailbox. However, it ends up in a folder named “Outbox. ” It can be irritating because your email must reach the intended recipient. On top of that, Outlook may display some error messages to you.

Methods to Resolve Stuck Emails in Outbox issue

Here are some reliable methods to fix the stuck emails in the Outbox issue. Follow each method carefully to get desired outcomes.

Method 1: Check Your Email Settings

At some point, emails may remain in the Outbox because you have scheduled them to be sent later. It is as if one wants to send a message at a particular time, which will be sent automatically. To fix this:

  1. Open your Outbox.
  2. Click on File.
  3. Click Account Settings.
  4. Choose the account you want to change the settings of.
  5. Click Change.
  6. Type in your new password if required.
  7. Then click Next, and then on the final window, click on the Finish button.

If you have a password for your Outlook data file, here is how you can change it:

  1. First, you need to launch the Outlook application on your local computer.
  2. Next, click the right mouse button on the email account you want to configure.
  3. Then select Data File Properties.
  4. Select Advanced, then go to Change Password.
  5. You have to type in your old password and then the new one. Confirm it.
  6. Press OK and then exit all the opened windows.

The above solution is useful in finding the solution to Emails Get Stuck in Outbox error. If not, then go for the other ones

Method 2: Change the Outlook connection status

Before diving into the solution methods, one needs to ensure Outlook’s connection status. If Outlook is offline, your email messages will be kept in the Outbox folder until the status changes to online.

To modify the mail server state, follow these steps:

  1. Open Outlook and go down to the bottom right corner of the screen. You will see Connected or Connected to Microsoft Exchange. If it is “Connected,” then the issue is not the server’s status in any way.
  2. Microsoft Exchange. If it is “Connected

  3. If the state is Working Offline, the user should go to the Send/Receive tab and click Work Offline to disable it. Now, resend the mail.
  4. the Send/Receive tab

  5. .However, if the status is still Disconnected, look at the Internet connection and correct it if necessary
  6. Method 3: Resend the email

    If you encounter the problem despite following the first method, you have no option but to resend the emails, but this time, make sure you are logged into the server, not to mention checking the internet connection.

    Also, restart your system once. Outlook will resynchronize with the mail server upon Outlook’s launch after a reboot, and as such, the email may leave Outbox. Also, do not open the mail immediately after sending it because it will lock the sending process.

    Another measure to be taken is the reduction of the number of attachments in the mail. If doing so successfully takes the mail out of the Outbox folder, you are done with your problem.

    Outbox folder

    Method 4: Automated OST to PST Converter

    While the manual methods above can be helpful, they may not always be effective, especially in severe Outlook data file corruption. Moreover, these methods can potentially lead to data loss if not executed correctly. For a more dedicated and comprehensive solution, consider using GoldyTools OST to PST Converter.
    GoldyTools OST to PST Converter is a professional tool that addresses various Outlook issues, including emails stuck in the Outbox. This powerful software offers several advantages:

    1. Free conversion of the first twenty emails in every folder
    2. Conversion of several OST files at a time
    3. It incorporates all Outlook items (mails, calendar, contacts, etc. ).
    4. It is compatible with IMAP, Office 365, Exchange, Hotmail, and Outlook.com
    5. Easy to use, no Exchange profile or server connection required
    6. Fixes and migrates damaged OST files
    7. Saves in PST, MSG, EML, HTML, MHT and PDF formats
    8. Divides and combines large PST files
    9. Allows for the search of OST items using the field names.
    10. Works with Outlook in versions 2000 up to 2019

    Conclusion

    Stuck emails in the Outbox can cause problems in your working process and communication with business partners. Although there are various manual solutions to fix this problem, employing a professional tool such as Goldytools OST to PST Converter guarantees a better approach.

How to resolve the “SQLite database file is locked” error

If you encounter the SQL error message: “SQLite database file is locked”, it needs immediate attention. This blog highlights the genuine reasons for the occurrence of this error message and how to resolve it manually. It also suggests that its users give a third-party SQLite Database Recovery tool a chance to perform SQLite Database recovery with an advanced and professional solution for complete data recovery without any data loss.

SQLite database
A Brief Introduction – SQLite Database

SQLite is a server-less, self-contained, zero-configuration database management system (DBMS) that organizations use to manage their data.

A Brief Introduction – SQLite Database

The error message appears when two users execute transactions on the same tables and modify the content simultaneously. The SQLite engine finds this abnormal, and the database gets locked. As a result, users cannot execute further transactions.

SQLite database
SQLite databaseSQLite database

Various scenarios for SQLite database getting locked

Scenario 1: When a SELECT transaction is activated on a table, the user tries a CREATE query.
Scenario 2:When the SELECT statement is pending, the user puts a new CREATE or DROP statement.
Scenario 3:When multiple threads access the same table, two or more SELECT queries try to access the same table.
Scenario 4: Multiple applications acc the database at the same time.
Scenario 5: Long-running transactions that do not commit or rollback promptly.
Scenario 6: Improper handling of database connections and cursors.

Manual method to resolve “SQLite Database is locked” error

To resolve the “SQLite Database is locked” error, use the backup copy of the same database. With the backup file of the SQLite database handy, you can restore it at the database engine and remove the locked SQLite database file. This approach is recommended to restore and recover locked SQLite database files. To perform this, follow the steps as:

Step 1: Take the Backup of SQLite file

Use the below commands to take the backup of the SQLite file (let us assume your SQLite database file name is Administrator.sqlite):
$SqliteAdministrator.SQLite
Sqlite> .backup main BackupAdmin.SQLite
Sqlite> .exit

By executing the above commands, you can get the same backup file in the same directory named BackupAdmin.Sqlite.

Step 2: Replace the backup database with the primary database

Use the below commands to replace the backup database with the primary database:
$mv Administrator old.SQLite
$mv BackupAdmin.SqliteAdministrator.SQLite

After the above queries are successfully executed, the backup file replaces the locked database. Users can execute new transactions and queries
since the backup file is not locked.
If you don’t have a database backup file with you, the above-suggested manual approach will not work, and you need to look for a third-party SQLite Database recovery solution.

Other solutions to resolve the “SQLite Database is locked” error

Solution 1: Ensure Proper Transaction Management
Ensure that transactions are completed promptly by committing or rolling back as appropriate.
Solution 2: Use Database Connection Properly
Always select the database connection properly after operations are completed.
Solution 3: Configure Timeout
Configuring a timeout duration helps where multiple accesses are possible.
Solution 4: Avoid long-running transactions
Keep the transactions as short as possible.

Professional Third-party SQLite Database Recovery Tool

SQLite Database Recovery Tool is a third-party professional solution that scans and recovers the locked SQLite database file. This tool locks SQLite database files and efficiently recovers corrupt, damaged, and deleted SQLite files. The tool recovers all database objects, including tables, views, indexes, rules, triggers, functions, deleted records, primary keys, unique keys, procedures, etc.
The SQLite Database Recovery tool recovers the corrupt, damaged SQLite database files that might get corrupt due to one of the following reasons:

  • Application or operating system crash
  • Power Failure
  • Disk drive failure
  • Flash memory failure
  • SQLite file gets overwritten by a rogue thread or process
  • Using a file descriptor continuously even after closing it.
  • Swapping journal files between two different databases
  • Overwriting a journal file
  • Moving a journal file without copying the journal
  • Broken or missing lock implementations in SQLite files
  • Using different locking protocols

Prominent Features of SQLite Database Recovery Tool

  • Recovers even a large-sized SQLite database file.
  • Recovers and restores corrupt or damaged .dB, .dB3, .SQLite,SQLite2, and .SQLite3 files.
  • Recover deleted records from SQLite database files.
  • Maintains the integrity of data of SQLite database files.
  • Displays preview of repaired SQLite database files.
  • It supports all versions of SQLite Engine, including the latest version, 3.27.2.
  • Ideally, it is compatible with all Windows operating systems, which include Windows 10, 8,and7.
  • Also, a trial version can repair and display a preview of SQLite database file contents.

Conclusion

This article discusses the common reason the SQLite database file is locked and how we can resolve this error manually. If the user does not have any backup copy and the database file gets locked, we suggest our users give the third-party SQLite Database Recovery tool a chance to recover the SQLite database file.

How to find location of OST Files in Outlook 2013, 2016, and 2019 on Windows?

Emails are crucial for communication, especially at work. Microsoft Outlook simplifies email management. A key feature is the OST file, or Offline Storage File. These files allow you to work offline. Later, you can sync any changes with the Exchange server. If you’ve wondered where OST files are stored, you’re not alone. In this blog, we’ll guide you in finding your Outlook Data File (.OST). This helps you manage your emails more effectively.

Where are OST Files Located?

Most of the OST files are stored under the ‘AppData’ directory of your Windows user account. This location can be different based on the versions of Windows and Microsoft Outlook which are installed. There are ways by which the OST file can be located and we are going to describe them below. All the methods will help you to follow a step by step procedure.

Step 1: Check the Default OST File Location

Refer to the table mentioned below to find the default location of OST files according to the versions of MS Outlook and Windows

MS Outlook Version Windows OS Version Path Location of the OST file
Outlook 2000
Outlook 2003
Outlook 2007
Windows XP C:\Documents and Settings\User Name\ Local
Settings\Application Data\Microsoft Outlook
Outlook 2007 Windows Vista
Windows 7
Windows 8
Windows 10
C:\Users\ User Name\AppData\Local\Microsoft\Outlook
Outlook 2010 Windows XP My Documents\Outlook Files
Outlook 2010 Windows Vista
Windows 7
Windows 8
Windows 10
Documents\Outlook File\
Outlook 2013
Outlook 2016
Outlook 2019
Windows Vista
Windows 7
Windows 8
Windows 10
C:\Users\admin\AppData\Local\Microsoft\Outlook

To find the OST file on your Windows PC, you can manually go through the route in File Explorer or use the path URL provided in the table above.

Step 2: Search for the OST File Using Outlook Options

In case you are unable to search for files at default locations or manually, you can take a look at below steps to find the OST files quickly on Windows XP, 7, 8, 8.1, 10, or 11 PC.

MS Outlook 2013, 2016, 2019, or 2021

  • Open the Microsoft Outlook application.
  • Go to File > Info > Account Settings > Account Settings.
  • Click on the Data Files tab and select the OST file associated with your account.
  • Click on the “Open File Location…” button.

MS Outlook 2010

  • Open Microsoft Outlook and go to File > Info > Account Settings > Account Settings.
  • Choose Microsoft Exchange Server from the list, then click on “Change.”
  • Click on “More Settings.”
  • In the Advanced tab, click on “Offline Folder File Settings.”
  • This will display the path where the OST file is located.
  • To visit the OST file location, copy the folder path and paste it into File Explorer.
  • This will open the File Explorer window and show you where the OST file is stored on your PC.

Step 3: Directly Open the OST File Location via Outlook

  • Here’s an easy way to find the OST file in any version of Outlook:
  • Open Outlook and right-click on your email profile name or email ID in the left sidebar.
  • Click on “Open File Location.”
  • A File Explorer window will pop up, showing where the OST file is stored.

Step 4: Professional Solution to Find and Convert OST File

The methods mentioned above can be time-counsuming, especially when dealing with multiple OST files. Also, these methods may not help you recover corrupted OST files. Therefore, it’s advisable to use a more advanced and powerful solution like the one offered by Goldytool’s OST to PST Converter.

This tool allows you to quickly find all your OST files in seconds. It also lets you convert OST files to PST, including emails, journals, notes, and more. Additionally, you can repair corrupted OST files and save them in formats like PST, PDF, and HTML. The software is user-friendly and easy to navigate.

Conclusion

Manual methods work well if you are technically sound and issues are minor. But in case of dealing with multiple OST files, you may require a professional solution like the Goldytool’s OST to PST converter. It will help you find the files without any hassle. You can also repair the corrupted files and convert in any format you like. Also, all your data like email, contacts, and notes are saved.

How to increase the maximum size for PST and OST files in Outlook

Microsoft Outlook is one of the most popular email clients today, and millions of people and companies use it. Over time, when users increase the number of emails, attachments, and other data, Outlook’s data files – PST for POP3/IMAP accounts and OST for Exchange accounts – may become too large. When this occurs, it can cause poor performance, inability to send/receive new emails, and, in some cases, data corruption. In this article, you will learn how PST and OST files grow large and how to raise the size limits in Outlook.

Reasons for Reaching Size Limits

If PST and OST files grow to their maximum size or become even closer to it, they can become an issue. Several factors contribute to this:

  • Accumulation of emails: In the long run, users have numerous emails, including those they receive and are not usually deleted after some time.
  • Large attachments: Large file attachments in emails also tend to fill up PST/OST files more quickly than other activities.
  • Calendar entries and contacts: Outlook’s calendar and contacts also contribute to the size of the overall package.
  • Journal entries: To the users who use the journaling feature of Outlook, these entries add to the size of the files.
  • Default size limits: Outlook versions before Outlook 2010 are found to have lower default size limits for PST/OST files.

Methods to Increase the Maximum Size for PST-files and OST-files in Outlook

Method 1: Modifying the Windows Registry

This method involves using the Windows Registry to change the PST/OST file size limit in size. Although it is quite effective, it should be used appropriately since wrong changes to the Registry may lead to system instability. Before you proceed with the next steps, it is advisable to backup the Registry.

  1. Close Outlook completely.
  2. Press the Windows key on your keyboard and hold it while pressing the ‘R’ key.
  3. One must enter the “regedit” command in the command line and press “Enter” to launch the Registry Editor.
  4. Go to the following key, which depends on the version of Outlook you have installed.
      ● Outlook 2019/2016: HKEY_CURRENT_USER\Software\Microsoft\Office\16.0\Outlook\PST
      ● Outlook 2013: HKEY_CURRENT_USER\Software\Microsoft\Office\15.0\Outlook\PST
      ● Outlook 2010: HKEY_CURRENT_USER\Software\Microsoft\Office\14.0\Outlook\PST

  5. Again, right-click on the right pane, click on New, and then click on DWORD (32-bit) Value.
  6. Give the new value the name “MaxLargeFileSize” (quotes included).
  7. Double-click the new value and set the Value data to the numeric value of the maximum size in MBs for instance, 51200 for 50 GB.
  8. Make another DWORD value called “WarnLargeFileSize” and set it to another figure, a bit lower than the previous one.
  9. Click ‘OK’ to close the Registry Editor and start the Outlook application again.

Method 2:Using Group Policy (for organizations)

The Group Policy method is suitable for organizations that have many Outlook users in their facilities. It enables the administrators to manage the PST file size policy in the organization from the central point. However, this method involves administrative access and cannot be used for a single user or home use.

  • Right-click on the Group Policy Management Console.
  • Create or modify a GPO.
  • They can visit the User Configuration > Administrative Templates > Microsoft Outlook > Miscellaneous > PST Setting.
  • Large PST Absolute Maximum Size and Large PST Warn About Maximum Size should be set up.
  • This is done by clicking on the Group Policy and selecting the option ‘apply’.
  • Method 3: Compact PST files

    The PST file compacting is the function integrated into Outlook that can help manage the size of the PST file, and this will not be possible if no changes are made to the PST file. It is a safe method that helps reduce the unneeded space between PST files. Nevertheless, it may not be good enough for users already at the maximum file size limit or even beyond it.

    Although it does not directly contribute to the increase of the size limit, it can help to reduce the size of the PST files:

    1. In Outlook, please click File, then Account Settings, then Account Settings.
    2. Go to the Data Files tab.
    3. Find the PST file you want to compact, right-click, and click on settings.
    4. In the new window, click the Compact Now button.

    Method 4: Automated Goldy Outlook PST Repair Tool

    There is no better way to increase the maximum size for PST and OST than by using the above-described method. But if your focus concern is over-sized files, which can inversely impact working or cause corruption, you can split or compress PST.

    With the professional way, users can split PST files according to their requirements, compress PST files and decrease their size without any problem to overcome the problem of large PST.

    Goldy Outlook PST Repair Tool is designed to manage large PST files easily, so you do not have to spend time fixing Outlook problems. This is especially useful when the other recovery methods do not work or when working with highly damaged PST files. Download it and use its trial version to know whether the tool is functioning.

    Conclusion

    It is necessary to raise the maximum PST and OST size in Outlook for effective email functioning, particularly for users with numerous emails and attachments. There are, however, manual approaches to it, but they are tedious and may involve a lot of steps. The Goldy Outlook PST Repair Tool is a single package that can handle large PST files, fix corruptions and restore lost data. This way, the user can save time and avoid data loss, and Outlook will remain convenient and fast.

How to repair SQL Database DBCC CHECKDB command for MDF & NDF Files

If you are experiencing the below symptoms in your SQL Server database files, then it is obvious that they have become corrupted or damaged and need immediate attention.

  • Frequent database crash
  • Constant downtime
  • Performance issues with the database
  • Noticeable lags
  • Major data loss or inconsistencies
  • Failure in the data backup task
  • Software errors and glitches
  • Random errors while opening or accessing the database
  • The database moves to the suspect mode

If you are looking for a solution to repair the corrupt or damaged SQL database DBCC CHECKDB command for MDF and NDF files, then this blog will really prove helpful.

What is an MDF and NDF File?

MDF stands for Master Database File, and NDF stands for Secondary Database File. Both MDF and NDF files store data and objects of the SQL Server database.
The MDF file is nothing but a primary data file containing the database’s schema and data, including tables, views, stored procedures, triggers, and other objects. It also contains metadata that describes the database’s structure.
NDF files are secondary data files that can be added to the SQL Server database to store additional data. They are used when the MDF file is not sufficient to hold all the data.NDF files help improve performance and storage management.
An SQL Server database has only one MDF file but can have multiple NDF files. SQL Server can operate with just an MDF file, but NDF files help manage larger databases and thus optimize performance.

Few SQL Server Error Messages

  • Msg 823 error in SQL Server
  • Msg 824 (I/O error) in SQL Server.
  • Msg 825 (read retry) in SQL Server.
  • SQL Server Page-Level Corruption
  • SQL Server Table Corruption Error.
  • Corruption on non-clustered indexes.
  • Database consistency errors reported by DBCC CHECKDB.
  • Corruption on data pages.
  • Metadata Corruption Error.
  • Error 9004 in SQL Server
  • Msg 7105 in SQL Server

Common reasons that lead to corruption or damage of SQL database

  • Human errors like accidental deletion
  • Sudden shutdown
  • Improper system termination
  • Abrupt power cuts or power outages
  • Virus or malware attacks
  • Hardware issues like bad sectors in the storage device, physical damage to the disks, etc.
  • Software bugs or glitches
  • Network issues
  • Changes in SQL account
  • Incompatible software or outdated installed software
  • Inappropriate isolation level
  • Insufficient storage space on the hard disk

DBCC CHECKDB Command

Using the DBCC CHECKDB command is a manual method for repairing corrupt or damaged Microsoft SQL Server database MDF and NDF files.

Syntax:

DBCC CHECKDB (Database_Name)

Pre-requisites of DBCC CHECKDB command

  • With an active license, users must have SQL Server Management Studio (SSMS) installed on their system.
  • Users must have Admin rights and privileges to perform this manual command.

Three Repair Modes with DBCC CHECKDB Command

REPAIR_FAST

Use this repair mode to resolve the backward compatibility issue, which means you can run SQL Server 2005 database files in SQL Server 2008.
While using this repair mode, ensure the database is in SINGLE_USER mode.

Syntax:

DBCC CHECKDB (N ‘Database_Name’, REPAIR_FAST) WITH ALL_ERRORMSGS, NO_INFOMSGS;
GO

REPAIR_REBUILD

This repair mode is preferred as it has a very low risk of data loss. It performs similarly to REPAIR_FAST, except that it rebuilds the indexes, which is a time-consuming repair process.
While using this repair mode, ensure the database is in SINGLE_USER mode.

Syntax:

DBCC CHECKDB (N ‘database name’, REPAIR_REBUILD) WITH ALL_ERRORMSGS, NO_INFOMSGS;
GO

REPAIR_ALLOW_DATA_LOSS

This repair mode, along with repairing the SQL Server, performs the following:

  • Allocates and deallocates the pages
  • Deletes the corrupt objects
  • Fixes page errors, structural errors in the database

Syntax:

DBCC CHECKDB (N ‘Database_Name’, REPAIR_ALLOW_DATA_LOSS) WITH ALL_ERRORMSGS, NO_INFOMSGS;
GO

Limitations of DBCC CHECKDB command

  • Unreliable
  • Complex
  • Requires experienced professionals to perform this manual method.
  • It doesn’t repair deleted objects from the database.
  • Users often skip pre-requisites of the DBCC CHECKDB command.

3rd-party SQL Database Recovery Tool

SQL Database Recovery Tool is a third-party professional tool that efficiently recovers corrupt or damaged SQL Servers. The SQL Database recovery tool repairs minor and significant levels of corruption in SQL Server database files. It recovers all SQL database components, including Rules, Functions, Tables, Triggers, Views, Stored Procedures, Indexes, etc.SQL. The Database recovery tool supports recovering database files of all SQL Server versions, including 2019, 2017, 2016, 2014, 2012, 2008, 2208 R2, 2005, 2000. The tool displays a preview of recovered data.

Conclusion

The moment the SQL Server database gets corrupted or damaged, users look for solutions to restore database files with complete accuracy. Initially, they try the manual method DBCC CHECKDB command, but it has its own limitations. To overcome those limitations, we suggest our users use an automated SQL Database recovery tool to efficiently repair and recover Microsoft SQL Server database files. The advanced solution repairs and recovers all SQL Server components without fail.

How to backup Microsoft Exchange Server Mailboxes?

Exchange Server backup and restore remain critical for organizations that are still using on-premises Microsoft Exchange servers. This article discusses the methods for backing up and restoring your Microsoft Exchange Server mailboxes.

Factors leading to damage or corruption of Exchange Server mailboxes

  • Logical and Physical errors
  • Hard disk failure
  • Corruption in database
  • Virus/malware attacks
  • System crash
  • Accidental file deletions
  • Software malfunctions

Two methods to create a backup of Exchange Server mailboxes

  • Using Windows Server Backup
  • Using PowerShell cmdlets

Method 1: Using Windows Server Backup

Windows Server Backup is an integrated backup feature in the supported versions of Windows Server. It includes basic backup functionalities and helps users manually backup files and folders, system data, and applications. Use the Windows Server Backup method to backup and restore Exchange databases.

Pre-requisite for Windows Server Backup

  • The Windows Server Backup feature must be installed on the local computer.

Step-by-step instructions for Windows Server Backup

To convert Exchange EDB to PST files, perform the steps:

  1. OpenServer Manager, selectTools and select Windows Server Backup.
  2. Select Local Backup.
  3. In the right pane, under Actions, clickbackup Once.
  4. In the Backup Options wizard, select Different Options and click Next.
  5. On the Select Backup Configuration page, select Full Server (recommended), and click Next.
  6. On Select Items for Backup. window, click Add Items. to select the volume(s) you want to backup, and click OK.
  7. Select Advanced Settings.
  8. On the Exclusions tab, click Add Exclusion to exclude any files or file types from the backup.
  9. Under the VSS Settings tab, select VSS full Backup and click OK. Click Next.
  10. Specify the Destination Type page, select a location where you want to save the backup, and click Next.

  11. a. When selecting local drives, the Select Backup Destination page will appear.
    i. Select an option from the Backup destination dropdown, and click Next.
    b. The Specify remote folder page will appear when selecting the remote shared folder.
    i. Specify a UNC path for the backup files and configure access control settings.
    ii. Select Do not inherit if you want the backup accessible only through a specific account.
    iii. Please provide the username and password for an account with write permissions on the computer hosting the remote folder, then click OK.
    iv. Click Next. Select Inherit if you want the backup to be accessible to everyone who has access to the remote

  12. Review the backup settings on the Confirmation page and click backup. The backup will start for the selected volumes (those you selected in Step 6 to backup).
  13. The Backup Progress page displays the status and progress of the backup operation.
  14. Click Close to exit the Backup Progress page. Any backup in progress continues to run in the background.
  15. Limitations of Windows Server Backup

    • You can only back up data on local hard drives.
    • Offers only a limited storage capacity of 2TB.
    • Only one copy of the backup is available.
    • No central management for managing backups and recovery across multiple servers.
    • No granular application support.
    • No control over the automatic deletion of older files and folders.
    • There is no support for encryption.
    • Limited options for restoration.
    • No support for virtualized Windows servers.
    • Limited backup options.
    • No support for Windows Server backups on a network location.

    Method 2: Using PowerShell cmdlets

    New-MailboxExportRequest

    Use New-MailboxExportRequestPowerShell cmdlet in Exchange Management Shell (EMS) to backup individual or selected mailboxes.
    New-MailboxExportRequest -Mailbox “MailboxName” -FilePath \\Servername\SharedFolderPathName\FileName.pst


    Pre-requisite for PowerShell cmdlet

    • The Mailbox Import/Export permission must be assigned to the user account.
    • Create a shared location and folder to save the exported Outlook PST files.

    Various Parameters with the New-MailboxExportRequest command

    Limitations of Windows Server Backup

    • This command is available in Exchange Server 2013 and later versions.
    • The process is lengthy and time-consuming.
    • It doesn’t display the status of mailboxes that are being exported.
    • Requires a large amount of space on server storage media.
    • Multiple mailbox exports may impact the server’s performance

    Third-party EDB to PST Converter

    We also suggest our users try a third-party professional EDB to PST Converter tool to efficiently convert Exchange EDB to PST files.
    The EDB to PST Converter tool allows you to back up complete Exchange Server data or select mailboxes. The EDB to PST Converter tool extracts mailboxes from Exchange EDB files and exports them to Outlook PST files. The tool scans and displays the extracted mailboxes and other items before converting them to PST files. The tool allows selective migration from Exchange EDB to PST. While performing EDB to PST conversion, the tool displays the progress of the EDB to PST export process. The EDB to PST Converter tool allows the export of Exchange EDB files directly to Microsoft Office 365 or a live Exchange Server.
    The free-to-download trial version has a few limitations and allows you to check the software’s capabilities. If you are satisfied with the demo version, you can purchase the licensed version with full capabilities.

    Conclusion

    You can backup Exchange Server mailboxes using Windows Server Backup or the New-MailboxExportRequest PowerShell cmdlet in Exchange Management Shell (EMS). You can also use a professional EDB to PST Converter to convert Exchange EDB to PST files. In addition to saving Exchange EDB to PST, the tool allows saving to other supported file formats, such as EML, MSG, HTML, RTF, and PDF.

How do you troubleshoot a slow migration issue in the Exchange Server?

If you are facing slow migration issues while migrating from an on-premises Exchange Server to another Server or Exchange Online (live Exchange Server or Office 365), this article will help you resolve the issue.

Error messages that appear while Exchange migration are:

  • StalledDueToTarget_MdbAvailability

The move monitors the replay queue of transaction logs into remote copies of databases. Migration stalls when the queue is long, and it generally lasts until it drains.

  • StalledDueToTarget_MdBReplication

The move monitors the copy queue of transaction logs to other DAG member servers.

Common reasons for the occurrence of the above error message are:

  • Network issues or blocked ports
  • Storage limitations or issues
  • Incorrect network configuration
  • Third-party software blocks the traffic or processes
  • Insufficient server resources, such as CPU and RAM
  • Services failed to start due to failed updates or other issues
  • StalledDuetoSource_DiskLatency or StalledDueToTarget_DiskLatency

This error message appears when the disk latency is at a level where adding additional I/O might impact user experience on the disk. It is located in the target mailbox database (MDB).

Common reasons for the occurrence of the above error message are:

  • Disk performance issues on the source disk or target disk
  • Insufficient system resources
  • Existing export requests in the queue
  • High response time from source or target disk.
  • StalledDueToTarget_Processor

This error message appears when the utilization of the CPU is too high on target MRS servers involved in the move.


  • StalledDueToTarget_BigFunnel

This error message appears when content indexing operations suddenly face an unexpected interruption and are actively recovering.


Common reasons for the occurrence of the above error message are:

  • High CPU or disk utilization on the target server
  • Network latency or bandwidth issues
  • Database availability or replication issues
  • Antivirus or firewall interference
  • Corrupted or missing index files
  • StalledDueToSource_MdbCapacityExceeded
  • StalledDueToSource_UnknownReason


The most common reasons for the above error message are:

  • Content Indexing health
  • CPU
  • High Availability Replication Health
  • StalledDueToTarget_MailboxLock
  • StalledDueToMRS_Quarantined
  • StalledDueToCI (Stalled due to content indexing)


The above error message appears when content indexing is done on the database copies.

Factors responsible for the performance of Exchange Migration

  • Exchange Server
  • Ensure that the Exchange Server is up to speed with the latest updates, hardware resources, and storage performance. Ensure that the Operating System and Exchange Server are working perfectly without any issues. Ensure that no background tasks are affecting the performance of the Exchange Server.

  • Migration Server
  • Ensure that the Exchange Server has good specifications.

  • Migration Engine
  • Ensure you choose the appropriate migration method—cutover migration, staged migration, hybrid migration, or a third-party application like an EDB to PST converter tool.

  • Network

    Ensure your network, including local infrastructure, perimeter network, and internet connectivity, is set up to perform Exchange Server migration services without delay.

  • Office 365 Service

    Ensure proper policies, subscriptions and settings are configured for the optimized hybrid deployment.

Powershell commands to help diagnose slow migrations

  • Get-MoveRequestStatistics
  • This command provides information about where the stall is and how much time is being consumed by the stall.
    Also, this command provides the count of total stalls, which further elaborates on where the migration is stuck and where time is being consumed.

  • Get-MailboxDatabaseCopyStatus
  • Use this command to check your database’s health and state whether they are mounted or not.

Limitations of Manual Method

  • Manual methods are challenging for new or non-technical users.
  • Need good technical knowledge to execute the steps.
  • The manual steps are complex and time-consuming.
  • There is a high risk of data loss.
  • The Exchange Server mailbox files may get corrupted or damaged during the manual steps if not performed correctly.

Third-party Application for Exchange Server Migration

The EDB to PST converter is the best tool for performing seamless data migration to a live Exchange Server. Using the EDB to PST Converter tool, you can access any Exchange Server EDB file of any Exchange Server version without having Exchange Server installed.
The EDB to PST Converter tool converts Exchange Server EDB files to Outlook PST files and is also capable of converting to other file formats, such as EML, EMLX, MBOX, PDF, VCF, MSG, and HTML.
EDB to PST Converter tool facilitates migrating Exchange Server Mailbox to a Microsoft Office 365 account.

Who should use the EDB to PST Converter tool?

  • Administrators are performing upgrades to the Exchange Server.
  • Users facing Exchange Server EDB file corruption issue.
  • Users are migrating from Exchange Server to other email clients like Office 365, Gmail, and Yahoo.
  • To convert Exchange Server EDB files to other file formats and cloud servers.
  • To export mailbox from EDB to PST.
  • A backup is needed to avoid the risk of data loss.
  • Export Exchange to PST for Archival, Compliance, and Legal Discovery purposes.

Key Features of EDB to PST Converter Tool

  • Supports exporting mailboxes from Exchange 2007, 2010, 2013, 2016, and 2019 to Outlook PST.
  • Efficiently converts complete Exchange mailbox items like contacts, emails, calendars, tasks, etc.
  • Allows exporting selective items from Exchange mailbox to Outlook PST.
  • Displays preview of emails before EDB to PST conversion.
  • It facilitates converting Exchange EDB files to EML, EMLX, PST, MBOX, PDF, VCF, MSG, and HTML files.
  • Allows exporting Exchange mailbox to Gmail, Yahoo Mail, Hotmail, GoDaddy, and Amazon Workmail.
  • Allows migrating Exchange Server mailbox to Microsoft Office 365 account.
  • Repairs corrupt, damaged Exchange Server database.
  • Recovers permanently deleted emails.
  • Generates detailed progress reports in CSV format.
  • Maintains original hierarchy and integrity of emails and folders.
  • There is no file size limitation for EDB to PST conversion

How does the EDB to PST Converter tool work?

    Step1:Launch EDB to PST Converter tool.
    Step 2:Select ‘EDB file’ for scanning.
    Step 3: The tool displays a preview of mailboxes before saving.
    Step 4: Select the Saving format as a ‘PST’ file.
    Step 5: Click Next to convert Exchange Mailbox to PST file

Conclusion

While migrating from one Exchange Server to another, numerous factors may affect your Exchange mailbox migration process. It would be best if you handled all those factors that may impact the Exchange Server mailbox migration process. You can opt for the professional EDB to PST Converter tool to ease your accurate Exchange mailbox migration without delays.

How to resolve Outlook disconnected from Exchange server issue

Microsoft Outlook is one of the most common programs for email access and works well with Exchange Server for business communications. Nevertheless, a common problem bothering users is the disconnection of Outlook from the Exchange Server. This disconnectivity can cause interruptions in productivity, refusal to send/receive emails, and restricted data accessibility. This blog will discuss the causes of this problem and possible ways of solving it.

Reasons for Outlook disconnection from Exchange Server

The Outlook disconnected from Exchange Server problem belongs to the class of problems that may have many origins, starting with network issues and ending with complex software issues. Let’s explore some of the most frequent causes:

  • Unstable or intermittent internet connection
  • Misconfigured Outlook account settings
  • Outdated or incompatible Outlook version
  • Overly restrictive firewall settings
  • Conflicting third-party security software
  • Corrupted or oversized Outlook data file (OST)
  • Exchange Server undergoing maintenance or updates
  • DNS resolution problems
  • Expired or invalid SSL certificates
  • Group Policy changes affecting network access
  • Insufficient storage space on the Exchange Server
  • Synchronisation conflicts between devices
  • Damaged or corrupt Windows user profile
  • Incompatible or malfunctioning Outlook add-ins
  • Network proxy server issues
  • Exchange Server reaching its connection limit

Methods to resolve the Outlook disconnected from the Exchange server

Here are some ways to solve the Outlook disconnected from Exchange Server problem

Method 1: Check the connectivity and status of the mailbox server

If you encounter a particular error, you should attempt the basic solutions before going to the complex ones.

  • First, check the system’s connectivity and the mail server’s status.
  • Ensure the system is connected to the internet and the mailbox server is active

For the mail server:

  • You can attempt to access the Exchange Server using OWA (Online Web Access).
  • If you are to log in successfully, the server will be on and functioning as it should.
  • If not, please contact the administrator

Method 2: Check work Offline status

Work Offline is also a feature available in Outlook, which allows one to temporarily log out of Outlook and work offline without being interrupted by new incoming messages. It is also handy when the network is unavailable or is of substandard quality. In case the Work Offline is turned on by mistake or intentionally, Outlook will indicate the disconnected from the Exchange Server message. To resolve this,

  • Click on the Send/Receive tab.
  • Look at the Work Offline feature.
  • If yes, put the pointer on it, right-click on it, and select disable.
  • Send/Receive tab

  • It can also be solved by flushing the DNS in order to allow Outlook to connect to the Exchange Server. For this, press the Windows logo + R on the keyboard, then type ipconfig /flushdns and press the ‘Enter’ button.

Method 3: Open Outlook in Safe Mode

The incorrect and incompatible add-ins can also lead to errors, make the Outlook data file inconsistent, and harm the OST file. To resolve the issue and ensure add-ins are not responsible for Outlook disconnection, the following steps need to be taken such as:

  1. Exit the Outlook program and then press the Windows button and the R simultaneously on the keyboard to bring up the Run box
  2. Type Outlook.exe/safe and press Enter.
    bring up the Run box
  3. Insert your login credentials and observe the connectivity status on the status bar. If it is connected to Exchange Server, turn off all the add-ins in Outlook and launch the application again.
  4. To know which is faulty, enable the add-ins one at a time and check Outlook’s status for disconnected status.
  5. Last of all, uninstall any problematic add-ins installed in Outlook and use the Outlook application without any problem.

Method 4:Fix the certificate issue

Outlook access needs proper certificates that offer the best application experience. Now and then, if you are logged in to your Outlook account and you are unable to connect with the Exchange server, then this might be due to damaged or expired certificates.
Pro Tip: For certificates, the best practice is to contact the administrator and use the seamless services.

Method 5: Create a new Outlook profile

Sometimes, for some reason, your Outlook profile is corrupted, and creating a new one is the correct course of action.

  1. First, shut down Outlook and then go to the Control Panel in the system.
  2. On the Control Panel window, select Mail by clicking on it.
    On the Control Panel window
  3. In the Mail Setup window, you will see the option Show Profiles; click on it.
    option Show Profiles
  4. Now, click on Add.
  5. Type Outlook’s profile name and click on OK.
  6. You should now follow the instructions shown in the wizard to set up your email profile.
    Email profile
  7. Once the synchronization is complete, close the Outlook and open it again to verify the connection status. If it remains connected, then the problem has been solved. At this juncture, one is advised to delete the Outlook profile to avoid any problems.

Method 6: OST to PST Converter

With manual methods, the problem can indeed be solved most of the time; however, the effectiveness of these methods is in question in case of critical OST file damage. This is where the Goldytools OST to PST Converter is very useful. This powerful tool aims to solve the problem of Outlook connectivity by converting the offline OST file to PST format. After conversion, the user can easily import it into Outlook.

The Goldytools OST to PST converter offers several advantages:

  • Repairs damaged OST files.
  • Retains all the folder structure and the properties of emails.
  • Compatible with all versions of Outlook.
  • Enables the user to choose which folders have to be converted.
  • Offers a simple design to enable proper usage and control of the application

conclusion

Outlook getting disconnected from the Exchange Server can greatly disadvantage productivity and communication. Although it is possible to solve the problem with the help of the manual approach, this is not always effective enough, especially if the information is severely damaged or the server is constantly experiencing problems.
For such a situation, the OST to PST Converter can be a reliable tool to help users regain their Outlook data in the shortest time possible.

How to fix “OST file is in use and cannot be Accessed” issue

OST files are an integral part of Microsoft Outlook that enables users to work offline, make changes to the Outlook data, and then synchronize with the Exchange server whenever the connection is available. Nevertheless, some circumstances may cause the OST file to become unusable, and the user will receive the message “OST file is in use and cannot be accessed.”

This error commonly happens when Outlook cannot read or write on the OST file, and thus, users cannot access their emails, contacts, and other important information. By knowing the causes and applying the correct measures, users can easily return to their Outlook information and continue working.

Reasons for the “OST file is in Use and Cannot be Accessed” issue

The issue “OST file is in use and cannot be accessed” is quite a popular one, and most often, it appears when the user is attempting to work with an Outlook data file. Here are some of the simple causes of this error:

  1. The Outlook data file may be opened in another application or process on your computer or device.
  2. The file may be opened in the read-only mode.
  3. The file has some problems with permissions.
  4. Multiple users running on the same OST file
  5. OST file accessed unauthorised
  6. Poor or bad internet connection
  7. The file could be damaged as a result of a virus attack or any other cause

Methods to fix the “OST file is in use and cannot be accessed” issue

Users can opt to work with manual and automated workarounds since error messages that state that the OST file is in use and cannot be accessed are inevitable. These solutions are:

Method 1:Disable cached Exchange mode.

This error can be due to several reasons, but one of the most general is that while your Exchange Server is running in Cached mode, your Outlook client is not. This can occur if you have recently transferred your emails to a new computer or upgraded your Outlook version. Here, we will explain how to turn off the Exchange cached mode to solve the error.

  1. Select the File tab in the MS Outlook.
  2. Go to Account Settings and then to Account Settings again.
  3. Account Settings

  4. Choose the Exchange account that needs to be modified and then click on the ‘Change’ button.
  5. Clear the check mark beside the “Use Cached Exchange Mode” option and click Next
  6. Exchange account

  7. Click on Finish and then on Close.
  8. Close the Microsoft Outlook and re-open it to have the changes implemented

Method 2: Recreate OST File.

Given below are four simple steps to repair the OST file and resolve the error:

  1. Close all programs that are accessing Outlook data files. This error is usually displayed when an application seeks to open an Outlook data file currently opened by another program.
  2. Once you are done with all the applications, shut down your computer. This ensures that all the applications are closed and do not have any link to the Outlook data file.
  3. The next step is to delete the .ost file. To do this, you should go to the file’s location on your computer and remove it.
  4. The last action that needs to be done is to restart Outlook. After Outlook has been restarted, the new .ost file will be created & the error message should no longer appear.

Method 3: End MS Outlook Processes.

If you are receiving the message “OST file is in use and cannot be accessed”, it means there is a process still in use with the OST file. The following are the procedures to shut down MS Outlook and other processes to address the error:

  1. Open the Task Manager by doing the Ctrl+Alt+Delete shortcut.
  2. Go to the Processes page.
  3. Go to the Task Manager, look for outlook.exe or msimn.exe, and click on End Process for all of them.
  4. Task Manager

  5. Quit the Task Manager and try to open your OST file once again.
  6. Method 4: use GoldyTools OST to PST converter.

    Goldytools OST to PST Converter is a professional tool that converts OST files to PST files in a few minutes. This tool also offers several features, including restoring deleted or permanently deleted items from an OST file, fixing damaged OST files, restoring emails, restoring password-protected OST files, converting encrypted OST files, and more. It also supports all versions of MS Outlook, including Outlook 2021 and Exchange Server 2019.

    conclusion

    The “OST file is in use and cannot be accessed” error can be quite annoying and sometimes can hinder your productivity, but the above methods can help you deal with the problem and carry on with your work without any more interruptions. If manual methods appear too complicated or take too much time to implement, Goldytools OST to PST Converter is the right solution to this problem. Get Goldytools now and ensure your Outlook data stays reachable and safe.

How to fix errors detected in the file Outlook OST?

Microsoft Outlook is an essential tool in business communications, storing data in OST (Offline Storage Table) and PST (Personal Storage Table) files. OST files are particularly valuable as they allow Microsoft Exchange Server to synchronize a user’s offline activities with the server once an internet connection is established.

Despite their utility, OST files are prone to errors that can disrupt data flow and access. This blog outlines practical methods to diagnose and resolve these errors.

Common causes of OST File Errors

Several factors can lead to OST file errors, each affecting data integrity and Outlook performance:

  • File Corruption: This can make the file unreadable, often resulting from system crashes or software errors.
  • Virus Attacks: Malicious software can corrupt or compromise the security of OST files.
  • Improper Shutting of Outlook: Exiting Outlook abruptly might corrupt the current session’s data
  • Excessive File Size: OST files that exceed size limits may become slow or unresponsive
  • Sync Interruptions: Disruptions during synchronization with the Exchange server can corrupt the data.
  • Unexpected System Shutdowns: These can lead to unsaved data being corrupted or lost.

    Manual repair methods for OST files

    Here are a few manual methods to address and fix OST file errors:

    Method 1: Restart and open Outlook in Safe Mode

    1. Exit Outlook if it is currently running.
    2. First, reboot your computer. This action eliminates temporary files. It also stops processes that may cause the error.
    3. Next,press and hold the ‘Ctrl’ key. While holding, click the Outlook icon. This will open Outlook.

    4. When prompted, select‘Yes’ to launch Outlook in Safe Mode.
    5. Enter Safe Mode first. Then, access your emails. Check your contacts and calendar data. See if the error message persists.

    Method 2:Recreate the OST File

    1. Go to Control Panel > User Accounts > Mail.
    2. In the Mail Setup dialog, select Show Profiles.
    3. Next, click on ‘Remove’ and then confirm to delete the Profile.

    4. Select the ‘Add’ option to create a new Outlook Profile.

    5. Enter a name for the profile and click on‘OK’

    6. Proceed with entering your email account details to set up the profile.
    7. Once the profile is configured, launch Outlook to check if the error has been resolved.

    Method 3: Use the scanpst.exe Tool

    1. Execute scanpst.exe with administrative privileges.
    2. Use the Browse button to find and select the corrupted OST file.
    3. Initiate the repair by clicking Start, then Repair if errors are detected.

      Limitations of using manual methods

      While manual methods can often resolve common OST issues, they have limitations:

      1. Time-Consuming: These processes can be slow, especially when dealing with large or multiple OST files.
      2. Technical Knowledge Required: A certain level of expertise is necessary to effectively use these methods without risking further data loss.
      3. Incomplete Recovery: Manual methods may not recover all lost or corrupted data, potentially leading to partial restoration.
      4. Recurrent Errors: If the root cause of the corruption is not addressed, the same issues may recur, compromising long-term reliability

      Advanced professional solution: Goldytool’s Outlook PST Repair

      For more severe or stubborn OST file issues, Goldytool’s Outlook PST Repair offers a powerful solution. This professional tool excels in repairing OST files with features designed for both efficiency and thoroughness

      1. Simplified Interface: User-friendly, facilitating easy navigation and operation.
      2. Comprehensive File Repair: Capable of resolving a wide array of corruption issues.
      3. Data Recovery: Efficiently recovers deleted or inaccessible items from damaged OST files.
      4. Preview Capabilities: Allows users to view recoverable items before saving, ensuring selective restoration.
      5. Flexible Data Saving Options: Recovered items can be saved in various formats such as MSG, EML, etc., accommodating different user preferences.
      6. Broad Compatibility: Supports all major versions of Outlook and is compatible with every modern Windows operating system

      Conclusion

      Manual solutions work for minor and some moderate issues. However, complex problems need a more sophisticated approach. Goldytool’s Outlook PST Repair offers a reliable and straightforward solution. It ensures your OST files are not only repaired but also restored to their optimal state.
      This is truly vital for supporting continuous business operations and data integrity. Whether you opt for manual fixes or a professional tool, timely action is crucial to prevent further data loss and restore functionality.

  • How to convert OST to PST format with Goldytools OST to PST converter

    For a lot of users, changing an OST (Offline Storage Table) file to a PST (Personal Storage Table) file is an important operation required to gain access to their Outlook mailbox data, especially when they are experiencing problems with an Exchange server or moving to a different platform. Goldytools OST to PST Converter is a trustworthy tool that guarantees your OST file undergoes an efficient and secure conversion process without any data loss.

    In this guide, we will demonstrate how to change OST to PST format using the Goldytools OST to PST Converter.

    Why do you need OST to PST converter?

    You need to recognize why an OST to PST converter might be necessary before starting the conversion process. Microsoft Outlook generates Offline Storage Table (OST) files in cached exchange mode, which lets you work without an internet connection. However, owing to a variety of reasons, these files can lose accessibility, which makes it important to change them to Personal Storage Table (PST) format.
    Here are some reasons why an OST to PST converter is a requirement in the following scenarios:

      1.Corruption in OST File: Should an OST file become corrupted, converting it to a PST file might enable the recovery of the data
      2.Exchange Server Downtime or Failure: If Exchange Server is not available, users might have to change their OST files to PST format to reach their emails.
      3.Outlook Profile Issues: If an Outlook profile is gone or unreachable, transforming OST files helps to ensure that data stays intact.
      4.Backup Purpose: Converting OST files to PST can create a backup that protects your emails, contacts, and additional Outlook data.
      5 Migration to a New Email Client: Migrating is easier with OST converted to PST because PST is more broadly supported.
      6.Data Transfer to Another PC: Migrating PST files to a new computer makes it easy to carry over Outlook data.
      7.Archiving Old Emails: For the archiving of old or essential emails in a format that is both readable and portable, OST to PST conversion is important
      8.Accessing Data Offline: You can access PST files independently of an Exchange server while offline.

    Why choose Goldytools OST to PST converter?

    The Goldytools OST to PST Converter is a complete and easy-to-use tool for converting unreachable OST files into the Outlook PST format. This advanced resource assures data precision and no loss throughout the conversion process, making it one of the best alternatives for those dealing with OST file conversion. Below are the top reasons why Goldytools stands out:

    1. For all OST to PST conversion purposes

      Goldytools OST to PST Converter processes large files, including encrypted OST files, and supports all versions of Outlook from 2000 through 2019. This tool is adaptable and addresses a large spectrum of user needs in file conversion.

    2. Conversion from OST to PST for Free

      Users can take advantage of the tool to convert the first 20 emails from any folder without charge. This feature allows you to take a look at and evaluate the conversion quality before deciding on a complete license.

    3. Facility to Extract All Your Mailbox Items

      Goldytools OST to PST Converter is here for the same and gets you all mailbox items along with emails, attachments, contacts, notes, tasks, journals, and calendar data, just like other best available tools via Goldysoft.WinControls. The item is deleted, and by doing so, you can recover any deleted items.

    4. Turn OST into Any File Format You Want

      The tool supports converting OST files into different file types, including PST, MSG, and EML. This involves various applications, which include PDF readers and text readers.

    5. Split Large PST Files

      PST files are highly affected by corruption if they are large. By decomposing PST files in sizes from 1GB up to 50GB, Goldytools is able to manage the data safely and easily and make it easier for you

    Step-by-step tutorial to use Goldytools OST to PST converter to convert OST to PST format

    Goldytools OST to PST converter user interface is simple and easy for the users. Follow the given steps to convert OST to PST format in simple steps:

    1. Select OST File to convert

      After running Goldytools OST to PST converter, it asks you to select the OST file that you wish to convert. Now, navigate to the OST File Location by clicking on the Browse button. After selecting the file, you can now opt for either a standard scan or an advanced scan based on the health of the file.

      1. ➔Standard Mode is suitable for regular conversions
      2. ➔Advanced Mode should be used if the OST file is corrupted or if a deep scan is required.

      ClickNext to proceed

    2. Start the Conversion Process

      When the OST file is loaded, the converter will scan and show a list of all mailbox items in that particular OST file. It lets you preview the emails, contacts, calendar entries, tasks, and other mailbox items. It offers the ability to stop once it has detected a given number of samples.

    3. Select a location to store the PST File

      When the scanning is complete, you will need to select a destination where you want to save this newly converted PST file. Click Browse and choose the location on your computer where you want to have the PST file saved. You can also use the Split Option to split large PST files into multiple smaller ones.
      Additionally, you can append a prefix to the name of the store (to keep your folders in Outlook organized).

    4. Convert and Save the File

      Press the Save button to convert block creation mode. The converter will now start converting the selected OST file to the PST format. This might take a few minutes, depending on the file size and number of items. After successfully converting the file, you should get a notification message telling you that the file has been converted and saved in a specified place.

    5. Get into your PST File in Outlook

      Once the conversion is complete, you can import this PST file into Microsoft Outlook as usual using the import process. If you want to restore an Outlook PST file, just follow this process:
      1) Open the version of Outlook that’s still working and then go to ‘File > Open & Export > Import/Export.’

    Conclusion

    For anyone who needs to change inaccessible or corrupted OST files into PST format, Goldytools OST to PST converter is an important tool. Featuring a user-friendly interface, batch conversion options, and sturdy features, it ensures that data loss is not a concern during the process. This converter provides a dependable solution for any situation, whether it’s server troubles, shifting data, or simply making backups for your emails. Get Goldytools now and discover how simple it is to effortlessly change OST files to PST format!

    Top 5 Outlook PST Repair Tool in 2024

    There are a few issues related to managing Outlook data files, generally known as PST, which are usually used when the Outlook PST gets corrupted. Thus, due to the size of the file, problems with the system, or a power failure, PST can become damaged. It can lead to data loss, slowness in working with Outlook, or complete access to emails.

    To avoid such problems and recover your data, an Outlook PST Repair Toolis inevitable. Multiple repair tools are quite effective for fixing the corruption issue of PST files in 2024. In the next section, we provide a brief of the five best Outlook PST Repair tools as per the client’s requirement.

    Goldytools Outlook PST Repair Tool

    The GoldytoolsOutlook PST Repair Tool is a reliable and multifunctional tool for repairing highly damaged PST files. It works with all Outlook versions and allows the restoration of crucial mailbox data, including messages, contacts, and tasks.

    The tool enables a view before writing the found files, and the interface is quite simple for beginners and experts. It also recognizes encrypted and password-protected PST and to enhance its efficiency and ease of handling, it can split purely large PST files

    Key Features:

  • Repairs large and severely corrupted PST files
  • Recover essential mailbox items like emails, tasks, and contacts
  • Allows preview before saving recovered files
  • Supports encrypted and password-protected PST files
  • Easily split large PST files for better manageability

    Stellar Repair – PST File Recovery Tool

    Stellar Repair for Outlook is among the most successful and reputed OST and PST repair tools that IT professionals and several organizations widely use. Besides, it effectively repairs PST files of any size and restores all mailbox items, including emails, contacts, and calendar entries. The tool also provides the option to export the recovered PST file in various formats such as MSG, EML, RTF, PDF, and many others.

    Key Features:

  • Repairs large PST files with no size restrictions
  • Supports recovery from encrypted and password-protected files
  • Provides enhanced preview of recoverable data
  • Exports recovered PST data to Office 365 or live Exchange Server

    DataNumen Outlook Repair Tool

    Outlook Repair Tool from DataNumen is one of those that boasts a very high rate of success and speed. It helps repair damaged PST files, which can occasionally cause virus attacks, power loss, or system crashes. The tool restores all the mailbox items, such as emails, contacts, and attachments, and it supports ANSI and UNICODE PSTs. DataNumen works with all Windows versions and is able to work with extensive PST files, so its use is suitable for both personal and professional purposes.

    Key Features:

  • Repairs severely corrupted PST files and restores all mailbox data
  • Supports recovery from encrypted and password-protected PST files
  • Recover lost emails, contacts, and attachments
  • Compatible with both ANSI and UNICODE formats

    Kernel for Outlook PST Repair Tool

    Kernel for Outlook PST Repair tool is meant to recover and fix corrupt PST files without any difficulty. It supports large-sized PST files and has some professional filters to let users search for emails or certain email IDs. At a certain range of times, the tool restores lost and deleted mailbox items and exports data to Office 365 or the live Exchange Server. It also enables users to save repaired data in forms such as PST, MSG, and DBX in order to have flexibility in the recovery.

    Key Features:

  • Repairs corrupted PST files and recovers all mailbox data
  • Supports selective recovery using advanced filters
  • Saves recovered PST files in various formats like MSG, DBX, and EML
  • Exports repaired data directly to Office 365 or live Exchange Server

    Aryson Outlook PST Repair

    Aryson Outlook PST Repair tool has three scan options – Standard, Advanced, and Deep, to deal with various types of PST issues. In its effective data recovery, all the mailbox items are available, and password protection/encryption is also allowed. With Aryson, users are also capable of directly dragging and dropping repaired PST files into Outlook.

    Key Features:

  • Repairs corrupt PST files and maintains folder hierarchy
  • Supports password-protected and encrypted PST files
  • Offers preview of recoverable data before saving
  • Saves recovered data in formats like PST, DBX, MSG, and MBOX

    Conclusion

    Make the right decision when choosing the correct Outlook PST repair tool if you are having problems with a corrupted PST file. From the five options above and having used the Goldytools Outlook PST Repair Tool, we can say that it stands out from the rest because it is easy to use, has great recovery powers, and can handle large encrypted files. GoldyTools is a real solution for businesses and individuals to work safely with Outlook data when necessary.

  • Step-by-step tutorial: Backup and Restore Outlook OST Files without data loss

    Email is the most convenient method of professional communication for a business, and it requires zero investment. It is more permanent than verbal communication and you can save it for an unlimited period too. You can include several non-text items like images, videos, links, and data sheets in an email. MS Outlook is the best organizer for a complete email management process and Microsoft offers lots of benefits to manage multiple accounts separately.

    5 Advantages of having MS Outlook application for email communication

    MS Outlook desktop is the majorly used form of the application and there are distinct benefits of using it. We are listing 5 important ones:

      1.It is designed for professional usage.

      Microsoft has designed Outlook as a professional email manager and its functionalities help a business to operate email communication, run email marketing campaigns, and collaborate effectively with a team. Becoming familiar with it can help in increasing productivity substantially.

      2.Managing contacts is easy.

      In Outlook, you can create multiple address books with different contacts and utilize them to send/receive emails. You can also use different commands to manage contacts.

      3.Integration with calendar features.

      Calendar is a highly beneficial feature to access in Outlook as it allows you to plan meetings, appointments, interviews, and multiple other activities and share with others. The manager can easily send meeting requests to your contacts and view upcoming appointments using the month, week, or day layouts. The same keyboard shortcuts you use for reading and composing emails can also be used for managing calendar tasks efficiently

      4.Execute shortcut commands to run different tasks

      The shortcut commands amplify the speed in which you can execute multiple tasks like sending a new email (Alt + S), replying to an email (Ctrl+R), marking an email as read (Ctrl+Q), marking an email as unread (Ctrl+U), etc.

      5.Access multiple accounts in an organized environment.

      There is no other application in which you can manage multiple accounts from different servers in such an organized environment. Outlook employs a folder system in which emails are organized in different folders and when you click on a folder, then its emails appear distinctively.

    Why do you need to back up the Outlook OST file?

    Outlook OST files belong to the Exchange Server and reside within the computer system. Its default location is –
    C:\Users\Username\AppData\Local\Microsoft\Outlook
    Just like any other file present in your computer, OST files are equally vulnerable to various threats like virus corruption, accidental deletion, abrupt shutdown, synchronization problems, etc. There are other important reasons like compliance that compel a business to have a backup of OST files.

    Backup OST file using the export method in Outlook

    MS Outlook can export an account’s data file to an offline PST file. You can consider it as a backup file. It is the most sought-after method of creating a backup file without any third-party application. The following is the complete procedure:

    1. In the Outlook application, click on the File option.
    2. File

    3. Select ‘Open & Export.’
    4. Open & Export

    5. Choose ‘Import/Export’ wizard
    6. Import/Export’

    7. Choose ‘Export to a file’ as the action to perform. Then, click Next.
    8. Export to a file

    9. As the file type, select ‘Outlook Data File (.pst),’ and click Next
    10. Outlook Data File (.pst)

    11. Select the folder to export from and you can also include subfolders. Click Next
    12. Select the folder to export from

    13. Browse the location to save the PST file and select the suitable option for managing duplicate files. To create the backup file finally, click the Finish button.
    14. Finish button.

    Restore the OST file using the import method in Outlook

    Once you have created the backup file of your OST data file, it remains separately from the account as on the offline file. When you need to access the data again, you can restore it to Outlook again. Here is the complete procedure:

    1. Click File in the menu bar.
    2. File

    3. Click Open & Export, then choose Import/Export.
    4. Open & Export

    5. From the available list, select ‘import from another program or file,’ then click Next.
    6. Next

    7. Select Outlook Data File (.pst) as the file type to import from and click Next.
    8. Outlook Data File (.pst)

    9. Click Browse and select the backup PST file from its location.
    10. Browse

    11. Select the data file and click Finish to upload it back to the application.
    12. Finish

    Final words

    Converting Outlook OST files to PST format offers significant advantages for all users. While the manual method is free, it comes with limitations. Goldytools OST to PST Converter, on the other hand, delivers quick, efficient processing with advanced features and an intuitive interface. It streamlines the OST to PST conversion process for a smoother experience. A free demo version is also available, allowing users to test the software by converting up to 20 items per folder.

    How to choose the best OST to PST converter software?

    Protecting the contents within an email account is a significant consideration for enterprises and individuals in the current world. Microsoft Outlook users are required to convert OST to PST format, which is why the software has been developed.

    This process can be quite challenging at times unless proper tools are used. In this guide, we will discuss in detail how to select the best OST to PST converter software. It will help you to make the right decision to protect your valuable email data.

    Why do you need OST to PST converter

    Conversion of OST to PST is critical in various aspects due to the need to gain access to your emails, create backups, and migrate data. Below, you will find some of the most important situations where an OST to PST converter proves to be a necessity.:

    • Recovering data from corrupted OST files
    • Accessing mailbox data when the Exchange Server is unavailable
    • Migrating email data to a new system or Outlook profile
    • Creating backups of important emails and attachments
    • Resolving synchronization issues between local and server data
    • Extracting data from orphaned OST files after account deletion
    • Complying with legal and regulatory data retention requirements

    How to choose the best OST to PST converter software?

    There are many OST to PST converters available in the market, so it is very important to choose the right one that can help in conversion without losing data. The following factors should be considered when one is comparing various software:.

    1. Conversion Accuracy and Data Integrity

      The most important factor that should be considered while converting OST to PST is the accuracy of the emails. Search for software that comes with an assurance of preserving all the properties of the email, the attachments, and the folders.:

    2. User-Friendly Interface

      This makes it easier to convert the data since an intuitive interface can greatly reduce the conversion time, especially when dealing with non-technical users. Select the software that provides a straightforward conversion procedure and avoid selecting complex and time-consuming programs.

    3. Batch Conversion Capabilities

      While dealing with a large number of OST files, it is wise to have a batch conversion option to reduce time and effort. Make sure that the software will handle more than one file at a time.

    4. Preview and Selective Conversion

      It is very helpful to preview the contents of the OST file and then select which items should be converted. This feature enables the user to have some level of control over the conversion process and address the issue of storage

    5. Check that the converter works with your version of Outlook and can handle different types of OST files: encrypted and password-protected ones.

    6. Additional Features

      Additional features to consider are the option to split large PST files, delete duplicate items, or export to formats other than PST (e.g., EML, MSG, HTML).

    Try Goldytools OST to PST converter

    When it comes to the best OST to PST Converter, the most suitable one is Goldytools OST to PST Converter. This tool aims to satisfy the requirements of everyday users and IT specialists while providing a wide set of opportunities with ease of use.

    Key features of Goldytools OST to PST converter

    Multi-File Magic

    This feature enables the user to convert multiple OST files into PST files in one go. It is useful for the time saver especially if one has many email files to modify. It does not mean that you do each file one by one but you can set it up to convert all the files at one time. This is especially useful for IT departments or anyone who would be handling multiple accounts. It helps to make the whole process quicker and ensures all of the emails are kept secure during the transfer

    All-in-One Outlook Transfer

    The Goldytools converter does not only convert emails. It also migrates your calendars, contacts, tasks, journals, and notes from OST to PST. This means that all the users’ data is retained every time they convert their files from one format to another. It is best if you use Outlook for more than just emailing. It will be a folder for all your appointments, contact lists, and to-do lists in the same format you had them. It is like relocating Outlook setup to another location, but you don’t lose anything in the process.

    Universal Email Compatibility

    It is also worth underlining that this tool can work with OST files of different email systems. It compatible with IMAP, Office 365, Exchange, Hotmail, and Outlook. com. This means that regardless of the source of your emails, you can most likely convert them. I find it very helpful, especially when you are migrating your emails or if you have multiple emails and you want to consolidate them. It tracks new email technologies, so it is suitable for the present and the future.

    Server-Free Solution

    It is capable of operating without having to be connected to an Exchange server. This is really helpful if you no longer have access to your old email server, such as in the case of a change of employers. One very important thing is that you can migrate OST files to PST without being connected to any server. It is ideal for converting old email files or if you have to download your emails but are unable to connect with the original server. This makes it easier to either transfer or retrieve your emails in various circumstances

    Data Repair and Conversion of corrupted files

    OST files, at times, get damaged, and one cannot open it. This tool can repair these corrupted files and convert them into functional PST files. It can also save your emails in other formats, such as MSG, EML, HTML, MHT, and even PDF formats. This is rather useful if you assume that certain emails were deleted due to a damaged file. It shows you various approaches to recovering your emails, even from files that you consider useless

    Conclusion

    When deciding on the right OST to PST converter, one should be aware that the data they are going to convert is crucial and should not be altered or lost in the process of conversion. Among the features of Goldytools OST to PST Converter is its ease of use and fast processing. The most important thing is a set of functions that will allow the use of this tool for different purposes. For those who require a tool for converting imperial measurements once or for those who use the tool on a daily basis, Goldytools has the right tools that will not let you down.

    What is the difference between OST and PST files in Outlook?

    If you have ever been a user of Outlook, you might be aware of the terms OST and PST. Outlook is a go-to tool for managing emails and organizing tasks, but many users use two different types of files without even realizing. These files are: OST and PST. OST files are automatically created for Exchange or Office 365 accounts, letting you work offline and sync later. Whereas, PST files are manually set up for archiving or storing data on your computer.

    Let’s break down the major differences between these files and why they matter for your Outlook setup.

    What is an OST file?

    OST files are a handy feature in Microsoft Outlook that is designed to help you manage your emails and other mailbox data even when you are offline. Therefore, it stands for offline storage table. OST is a type of file that Outlook uses to keep a local copy of your mailbox on your computer.

    Additionally, when you set up an exchange account in Outlook, the software automatically creates an OST file on your computer. Now, this file contains a local version of your emails, calendar events, and some other important data. The best part is that you can still access and work with all this information without requiring it to be online. Thus, you can work on a plane, in a remote location or just dealing with a spotty Internet connection.

    Note that OST files are especially useful in two main situations. First, if you are using Outlook with Microsoft Exchange Server in cash exchange mode, your OST file allows you to work with your data offline. Whatever changes you will make, like reading emails or setting up appointments, will automatically be saved locally and then synchronized with the exchange server once you’re back online. Second, if you are accessing mail through Outlook using the Outlook connector, an OST file helps you manage Hotmail data offline as well.

    What is a PST file?

    A PST file is a data file used by Microsoft or where Outlook stores a local copy of all important information like emails, calendars, events, tasks, and contacts. This file format allows you to keep a backup of your data and easily transfer it to different devices if needed.

    If you are using a POP (Post Office Protocol) account or Outlook, your emails are saved in a PST file. POP, including its newer version, POP3, is one of the older email protocols. You can download emails and save them directly to your computer using POP. This means that once emails are downloaded, they can be deleted from the server. This setup was useful in the past when people typically used just one device to check their emails.

    However, now, most of us access our emails using multiple devices like smartphones, tablets, and computers, so this method is not practical at all. Since POP does not synchronize changes across devices, any action you take on one device, such as deleting an email, won’t be reflected on the server or on other devices.

    Differences between OST and PST files

    You must understand the differences between OST and PST files for using Microsoft Outlook effectively. Each type serves a specific purpose, so knowing when to use each can help you manage your email and data better.

    1. Purpose and Use

      Both OST and PST have different purposes and use like one is great for back up while other is amazing for no-internet situation.

      OST: OST is designed for offline access and synchronization with a server. It is primarily used with Exchange or Microsoft 365 accounts.
      PST:PST is used for local storage and backup. It is more about managing and archiving your personal Outlook data.

    2. File Size

      File size differs significantly between OST and PST files which impacts how you manage your data. Since these files vary in size, one goes super fast while other takes time and space.
      OST: OST files are always larger due to synchronization.
      PST: Synchronization makes PST file size smaller.

    3. Security

      Check the security of your data of OST and PST files because they are holding your sensitive info.

      OST: It is safer and more secure as it is fully encrypted.
      PST: It is less secure as data files are stored on a local computer.

    4. Accessibility

      Accessibility is key for users who need to work efficiently, regardless of their internet connection. One of these files lets you access it offline while other doesn’t.
      OST: OST files allow you to access previously downloaded data files offline, such as notes, emails, contacts, and other info.
      PST: These files allow you to archive all types of data.

    5. Automatic vs Manual Creation

      You must know if these files are automatically created or require you to set them up manually. The mode of creation decides the workflow and efficiency.

      OST: OST files are automatically made by Outlook for accounts like Exchange or Office 365.
      PST: PST files are manually created to archive or organize emails and data on your computer.

    6. Management

      Effective management of your Outlook files is crucial for maintaining organization and accessibility. Check below how both files are managed differently and if they impact your workflow.

      OST: OST files are managed automatically by Outlook and are specific to the user’s profile and server account.
      PST: PST files can be moved and managed manually (e.g., for backup or transfer).

    Why convert OST to PST Files?

    It’s a great and safe idea to convert OST to PST files. Here are six common situations where this conversion is needed:.

    1. Exchange Server Crashes: If the Exchange Server goes down, you can’t access your data online. However, PST file lets you use that data until the server is repaired so you must convert OST to PST.
    2. Server Maintenance: You can’t access your mailbox during scheduled maintenance. If you need urgent access, you can convert the OST file to PST to retrieve your data.
    3. Job Change: When you switch jobs, your old OST file won’t work with the new organization’s server. Hence, convert it to PST to access your old emails and information.
    4. Data Migration: If you’re moving to a new system, moving from OST file to PST makes it easier to transfer all your important data without compatibility issues.
    5. Recovering Deleted Data: If you accidentally delete emails from an OST file, you can often recover them by converting the file to PST, even if they’re not available on the server anymore.
    6. Mailbox Corruption: If your OST file becomes corrupted, convert it to PST as it may help recover your data. This is especially useful when standard recovery tools fail

    If you are looking for a converter that can do all the above mentioned things for you then look no other than GoldyTools OST to PST converter. Using this tool for OST to PST conversion can simplify the process and ensure better results.
    It allows you to convert the first 20 emails per folder at no cost, giving you a chance to test the tool before committing. Plus, you can convert multiple OST files to PST at once. Thus, it saves you time and effort, especially if you have a lot of data to manage. Besides, it preserves the original formatting and structure of your emails and other data during conversion, so nothing is lost or altered.

    Conclusion

    Both OST and PST files are important in Outlook but they have different functions. Indeed, PST is a more reliable and safer option so most users are converting OST to PST file formats. There are many tools available for converting OST to PST but you must choose a reliable and safer one like GoldyTools OST to PST converter. If you want to know more, you can reach out to us!

    Top 10 OST to PST converter tool in 2024

    In situations like inaccessible Outlook data, Exchange Server crash, or corrupt OST files, the OST to PST Converter tool is inevitable. OST files are used to store emails, contacts, and calendars when Outlook is working in offline mode, and for several reasons, the files may become corrupt. This is the area where OST to PST converters are of great help.

    These OST Converter Tools help migrate OST emails to PST format, which may then be loaded to Outlook later. Here are the best 10 OST to PST converter tools in 2024 and what makes them exceptional.

    1. Goldytools OST to PST Converter:

    Goldytools OST to PST converter OST to PST Converter is the best tool for converting the OST file into PST format when the OST file is not accessible. It also provides you with the ability to convert OST files into other formats, such as MSG, EML, and MHT.

    Features:

    1. Free conversion for the initial twenty emails per folder
    2. Conversion of many OST files at once to PST
    3. Full synchronization of all Outlook elements, including e-mail, calendar, and contacts, etc.
    4. Support for various sources such as IMAP, Office 365, and Exchange
    5. Does not demand an Exchange profile or server link

    2. SysTools OST to PST Converter:

    One of the most recommended options to convert an OST to a PST file is SysTools OST to a PST Converter. This is appropriate for small business venture and also large companies.

    Features:

    1. High-speed scanning functions
    2. Preview functionality for OST data with metadata
    3. Smart search option to find OST files
    4. For example, the removal of S/MIME and OpenPGP encryption
    5. Cross-platform compatibility (Windows and Mac)

    3.Kernel for OST to PST Converter:

    A highly effective tool, Kernel for OST to PST Converter is the most effective tool for converting all the orphaned and corrupted OST files and storing the information in PST format without the loss of information.

    Features:

    1. Backing up OST files and converting them in bulk and large sizes
    2. The ability to split PST files by size
    3. Selective migration for the emails that match specific criteria
    4. Cross-platform migration solutions
    5. It also supports all the Windows versions.

    4.SysInfoTools OST to PST Converter:

    SysInfoTools OST to PST Converter allows for conversion at a rather fast rate while giving users several options for exporting files in PST, EML, DBX, and MSG.

    Features:

    1. The ability to turn emails, contacts, tasks, and many others.
    2. Multiple output options (PST, EML, DBX, MBOX, etc.)
    3. Migration with filters based on the date
    4. Conversion of files and folders in batch
    5. Maintaining folder structure and data consistency.

    5.Aryson OST to PST Converter:

    Aryson OST to PST Converter is an easy-to-use software with a clear and intuitive design. It allows users to make OST file conversion possible without needing to have a computer professional.

    Features:

    1. Changes to different email file formats
    2. Advanced options of mail filtering for accurate conversions
    3. Compatibility with Outlook versions 365, 2019, 2016, etc.
    4. Preview of OST mailboxes and attachments using preview functionality
    5. Windows, Mac, and Linux compatibility

    6.Stellar OST to PST Converter:

    Relied by IT professionals to convert OST to PST files: across the globe, Stellar OST to PST Converter is well-appreciated for the accuracy it uses to convert large and encrypted OST files.

    Features:

    1. OST to PST and other file format conversion
    2. Maintenance of the original folder organization
    3. PST file splitting without user intervention
    4. Supports all the Windows operating system versions.
    5. Batch conversion capabilities

    7.Softaken OST File Exporter:

    Another top-ranking software is Softaken OST File Exporter, which supports OST file conversion at high speed and comes with strong functions.

    Features:

    1. Endorsement for converting file that has been locked by password
    2. The capability to work with large OST files with attachments
    3. Specificity of search options for data retrieval
    4. Flexible export options
    5. Automatic identification of email server and port numbers

    8.BitRecover OST to PST Converter:

    BitRecover OST to PST Converter is one of the fastest and most efficient tools to convert OST to PST files:. It has the quality to convert multiple OST files at the same time.

    Features:

    1. Saves to more than 30 file formats
    2. Size of OST file is not restricted
    3. Folder mapping feature in different languages
    4. Converting OST to PST with or without Outlook
    5. Additional filtering for specific conversions

    9.Corbett OST to PST Converter:

    Corbett OST to PST Converter sets itself apart with its search feature, and it works seamlessly with IMAP. Secures all the data to its highest level during the conversion process to avoid loss of authenticity.

    Features:

    1. Complete conversion of OST attachments, tasks, and notes
    2. The results are 100% data and folder integrity.
    3. Enhanced search options for better site exploration
    4. Conversion choices for converting large numbers of users
    5. Auto identification of email server and port number

    10.PCVITA Converter for OST to PST:

    PCVITA OST Converter Tool: is one of the most effective tools for converting OST files into PST, MSG, and MBOX. It makes conversion easy for both the users and business entities.

    Features:

    1. Platforms List of Supported Output Format: EML, EMLX, PST, MSG, etc.
    2. Standard and fast scanning options
    3. Maintenance of metadata and the attachments
    4. Compatibility with both Windows and Mac operating systems
    5. Easy to convert orphaned OST files without having to use Outlook.

    Conclusion:

    As for OST Converter Tools, all the programs mentioned above are different and offer specific options to meet all customer needs. Goldytools OST to PST Converter is the best OST to PST Converter in the market. It has an affordable price, is easy to use, and is fast; therefore, we recommend it for 2024.